Monday, January 31, 2011

eyelook: romantic warm pink look

The month of love is almost here & I'm sure that most of you are already planning out what your outfit or look would be for your Valentines date. Last year, I said that Red is the color of Valentines... i still think that red is still the color of Valentines, but then so is pink! So i decided to make a look using pink with a hint of warmth on it. This would be perfect for a daytime look for it will give off a fun & flirty look!


Following how i did my gradient look HERE, i just did the same steps...

This is already my 3rd make-up post. I guess my love for eye make-up is slowly returning! Yokatta na~! I thought for sure that i would be adding my eye shadows on my blogsale for i haven't felt the urge to put any eyeshadow for like almost half a year! I'll just be doing an eye make-up for i still don't want to apply face make-up since my acne is still acting up...

I used my pigments when i did this look & since they are not available anymore so i just swatched it so if you have any shadows that has the same color with these, then you can just use it as a substitute.


color 1 is a cute light pink color
color 2 is a dark pink color
color 3 is a gorgeous gold color
color 4 is a warm bronze color
Again, this is a 'for dummy version' gradient look for this is very easy to do...

Line all four shadows like so...


Blend the inner 2 colors...


Then the 2 outer colors...


Then finally you join the 2 colors by blending it more... Voila!


Make sure you bring the colors down on your lower eye area like so...using an angled brush


Apply highlighter on the brow bone area as well as the area under the brow so it won't look bare.


My friend has been asking me over & over how i apply my eyeliner. She said that she is having trouble with eyelining. It's also the same with me... but what i do to prevent uneven eyeliner is to apply eyeliner with my eyes open.


I find that compare to applying eyeliner with eyes closed, it's easier to control how thick or thin i want it to be. Anyway, your eyes are open most of the time so you have to exactly know how your liner looks like with your eyes open, not closed.


Again, when you tightline, make sure that you do an upward feathery strokes then you'll be able to cover the gaps in between your lash line so that you'll have a well-defined eye. You can also line the lower waterline if you feel like it. I actually lined my lower lash line in my pic above.

For those who have deep set eyes & wanted to darken the crease area, you can do so by using a brown color instead of the bronze. But since i look weird whenever i darken my crease area so i just opted for a bronze color. But, of course, feel free to adjust the intensity of your eye make-up, especially if it's for a night out.

There ya go!
I hope i'll be able to come up with another one in time for Valentines day.

Hope y'all have a good start for your week!
Jaa ne~!
^_^

Tuesday, January 25, 2011

Bobbie's Foil it Collection


The current collection that Bobbie released was the Foil It Collection which only has 3 shades. I hope that Bobbie would come up with more shades for this is a great collection!

As what the name says, the effect of this is more of a metallic foil effect. It's very opaque & you would only need to do 2 coats just to be able to have that full look.

This is how the 3 polishes look like...


I included the name of the shade of the 3 in the pic & how it looks like on the bottle.

First is the Adored shade...


It's a really pretty metallic burgundy-ish! I'm sorry if i wasn't able to take a pic of it in natural light for it was already a bit dark when i was able to swatch the shade. What you see on the bottle is actually the shade that you will be getting.

Second is the Charmed shade...


This is my favorite amongst the 3 for it is a great metallic bronze-ish polish. Really pretty! Love it to bits!

Last is the Electrified shade...


A great metallic silver polish! This is something that really screams silver! If you are tired of the usual silver that doesn't hold an appeal then you ought to try this for this really catches attention! It's metallic so naturally it would do that...hehe

I'm really happy that Bobbie has a good selection of polishes without paying for an exorbitant price. The only thing that i'm having trouble with this brand is that the drying time is quite slow. It could be touch dry after a couple of minutes but the fully dry stage takes after a couple of hours.

Yes, a couple of hours! Would you believe if i said that i applied it in the evening, waited for 2 hours to dry... then i fell asleep waiting. The next day when i woke up, there were hair marks all over my polish. It wasn't completely destroyed, but hair marks after 2 hours (or who knows if it even exceeded than that for i wasn't keeping a close tab on the clock)!?

Come on!!!
Isn't that annoying?!
Mukatsuku!!!!
(-__-")

I also have the Holoprism collection,right? Drying those is a pain in the neck!
Bobbie, please do something about this! I don't have any negative things about Bobbie except the drying time though.

What can i say about it more?...It's locally available (of course!), cheap (it's only Php33 or $0.75) , doesn't have limited time in each specific collection, doesn't contain the big 3 toxic nail polish ingredients.... but the drying time is the only thing that's holding me back. Is it because it doesn't contain toulene?!

Oh, maybe one thing too, that i personally want is to be able to have this in a bigger bottle. Most Bobbie polishes are only 8 ml... though there are also other shades that are being sold in a bigger bottle, which i think is 15ml, but that's very limited. The shades i think are the usual neutral colors... The funky nail shades are only packed in the smaller bottle though.

If Bobbie would be able to come up with a better formulation but retains the shade, then this is something that would be highly recommended! But nevertheless, it is a good brand.

For my fellow pinays out there, am i the only one having trouble with the drying time? What's your experience? How can i make this dry faster?! This is really annoying!

Hope you could give me a tip or two~

Have a great day!
Jaa ne~!
^_^

Monday, January 24, 2011

eyelook: gradient blue purple

I already have a gradient blue look...as well as gradient purple, but i have not yet combined blue & purple. It's actually a good combination since they almost belong in the same family color so it's easy to combine the two.

For those who are having a hard time blending colors, this is an easy way to have a well-blended, gradient look without having to go to make-up school just to learn the basics of it. I was once at a loss on how to achieve that gradient look & i even considered going to make-up school just to achieve it! LOL I'm serious though!

I have done a couple of gradient looks already & if you are quite familiar with how i do it, i use 4 colors which makes blending the colors really easy. The key, of course, is to have a good blending brush. If you are on a budget then just get the ELF blending brush. I love it! I have a couple of blending brush but ELF is the one that i reach whenever i do my eye make-up. I actually have 3 of those!


Let's let the pictures do the talking now...

These are the colors that i use. If you don't have the 88 palette just pick any colors that are almost the same with these...


Line them up like how i did. By the way, make sure that you got a good primer underneath & a sticky base so that your eyeshadow will really stick. Apply the colors in a patting motion so that you will be able to pack more colors on your lid.

Blend colors 1 & 2 first. It's easier to work with the lighter colors first. If you feel that you don't have enough colors to work with, then feel free to dip your brush to get more color. Click the pic if you want to see it better.


Then blend 3 & 4 together. At this stage, you can slowly bring the purple at the top part of the lid so that the top part of the blue has a hint of purple on it.


 Now's the time to blend the 2 colors together...


After a couple of blending motion, you'll be able to have this look.


Believe me when i say that this tutorial is dummy-friendly. I am a living proof that even beginner's like me can achieve a well-blended look! You might be needing more colors than necessary but it is worth it!

So, of course, you would have to bring the colors down on your lower lash area... Apply the colors how the way you did it at the lid area. A good angled brush will do the trick!


Then get rid of all the fall-outs & excess colors that you have to polish off the look!

Now, this is the hardest part of all... eye-lining! I'm not that good in achieving an equal-looking eyeliner, but with practice im sure you'll be able to get the hang of it.


Did you notice how obvious the blue color at the root of my lashes are on the 1st picture? When you tight-line, make sure that after you apply it on your upper water line you also do feathery strokes going upwards like the 2nd picture so that you'll be able to fill the space where your lashes grow. Doing so will help make your eye lining perfect!

This is how it looks like after all the trouble of waterlining. It would look full & well-defined after mascara application. Oops, i didn't line my lower lash line though.


Since I don't have enough time when i did this tutorial so i did just one eye..hehe

Finish the look with your favorite lipstick. Since this is not really a dark smokey look so you can get away with using pinks & corals!


 Whew~!
2nd make-up post!

Hope y'all have a good day!
Jaa ne~!
^_^

ps:
i used Mac Viva Glam Cyndi in this pic
^_^

Sunday, January 23, 2011

eyelook: dark smokey orange look for oriental eyes~

Smokey eye make-up has always been pretty tricky for me since i have a semi-monolid so often times those lid colors just doesn't show up, no matter how bright they are, when my eyes are just relaxed. I feel like it doesn't suite me so if ever i do eye make-up it's just a soft wash of bright color plus lots of mascara... that's it. So i stopped doing smokey looks but as what i said, when i watched Nana, i just feel like doing a smokey look.

Speaking of Nana, i have watched a lot of dramatic, slice-of-life type of anime, but this is the only one that really made a big impact on me. It's beautiful in a way that it flawlessly showed how fickle/tough/sensitive/hard/immune/courageous/nosy/caring, etc a woman can be. The impact it made is so big that my curiosity led me to watching the movie & read the manga. Heck, i've downloaded the songs already, put it on my player & have been playing it over & over already.... up to the point that i have already memorized the lyrics! what the heck?! (-__-")

Anyway, let's go back to the main topic, i feel like if you make me start on Nana, i can go on forever raving about it. LOL!

This is the look that i had the other day


Let's do the tutorial for the eye make-up. Oh, i deliberately did the winged eye make-up, as you can see, having a sharp winged eye make-up can make the eyes look smaller. So if you want a rounder eye make-up don't wing it. Just round it up, like how i did in the tutorial.

These are the colors that i used...


Just look for any colors that you might have had.

I mostly start my eye make-up by highlighting my brow bone. I know that for some girls, they do the highlighter last, it's just based on your own preference...


Then pat the lid color starting from the inner corner of your eyes going out. Fill up 2/3 of your lid area.


Then put the green eyeshadow at the top part of your lid color & also at the remaining 1/3 of your outer lid area. This would give a green wash on amidst your dark shadow.


Apply the dark eyeshadow using a blending brush. Make sure that you tap the excess powder on your brush for you don't want to overpower the green color. It might look darker here, but not in real. I guess my camera washed the green color. That's why it's a must to have as little dark eyeshadow as you have on your blending brush.


Using a clean blending brush, blend the colors rounding it upward, not going out. Blending it in a round, upward motion would give your eyes a rounder look. Avoid concentrating the color on the side, do most of the blending at the top of the lid area.


Now if you want a winged, cat eye-look then feel free to blend it outward. If you want a really precise eye make-up like THIS, then you can put a sticky tape at the side of your eyes before you do your make-up. It would help give you a really precise slant-eyed look. Cat-eye look type of make-up always reminds me of Cleopatra...

Then don't forget to bring the color down on your lower lid area. I apply the highlighter at the inner corner, followed by a hint of orange & also the green color underneath the dark color.


If you apply eyeliner, i suggest that you do not wing it out, actually you can wing it out but try not to do a really long wing,ok? It would defeat the purpose of your "rounding" your eye make-up.


Finish it off with lots of mascara or false eyelashes. If you don a smokey eye make-up that's the time when you ought to have a va-va-voom lashes! It is a must to do so, so that it would open up your eyes.

I just did this tutorial in one eye though, but believe me that "rounding" it up would make an oriental eyes bigger compare to the usual smokey look tutorial that you always see being done by those that got deep-set eyes.

 Products used:
There ya go!
Next eyelook post will be the bluish purpler look that i did before.

Hope that you will all have a great week~
Jaa ne~!
^_~

Friday, January 21, 2011

i miss putting make-up!

Just a quick post...I have a lot of drafts sitting on my dashboard but this is something that i want to post as early as i can so that i won't ever forget to do the tutorial.hehe

Yesterday, as i watched the anime NANA, it inspired me to do a bright smokey cat-eye look. I finished watching the whole 47 episodes for 2 days & i have to say that its worth it! haha!

I'll not bore you with the details about it, but if you are looking for that real slice-of-life drama anime you ought to watch it.

Going back, its been a while since i played with my eyeshadows but as soon as i start patting it on & blending it just dawned on me how much i miss applying make-up. I just steered away from make-up since my acne acted up again late last year & whenever that happens i just don't feel like putting anything on my face to make it heal faster. Anyway, im sure all  people had suffered a zit or two,right?

I won't do a tutorial of this look yet for when i did this, i was on my room & it wasn't suitable for taking pics while i was making it so i'll just do a tut later on, recreating this will be easy enough.


I never did like orange but since i always relate Nana Komatsu to orange so i decided to pick up the orange color on my palette as the lid color, for some reason the room 707 made me think of color green & of course the crease color would be black... actually it's not just a matte black. It's a sparkly black for Nana Osaki.

It just dawned on me that most eye make-up tutorials especially on youtube always stresses that you ought to darken the crease for a bolder, more defined look, making the edges taper so to have that cat-eye look. I agree with the bolder look, but i think this is more applicable to those that got deep-set eyes. Why?

Looking at my pic here:


It did made my eyes look bold, but for some reason it just made my eyes look smaller all because of the crease. I'll do a smokey eye tut for asian-eyes some other time. Something that can make an oriental eye shape bigger without doing that tapered edge.

Then the other day, i was watching Prince of Tennis (yes! i love anime! im not ashamed to admit that i still do watch it even though im already in my mid-20s) so i decided to do a bright eye make-up. I haven't done a blue-purple look yet so i experimented & i think the combination is not bad,ne?


I always thought that blending eyeshadows is so hard to do, but with the right tool, you can achieve that gradient look in no time.


I'm just not keen on darkening the crease area for the reason that i stated above so i try to avoid really dark colors on the crease. Bright colors can make your eyes bigger & stand out more!

Well, that's just a quick post for now. I'll try to get on with the tutorial once i'm free. I hope my acne will clear out so that i can play with my make-up again. With that, i'll go back to researching about South Eat asian countries again.
^_~

Hope you all are enjoying your day!
Jaa ne~!
^_^

Tuesday, January 18, 2011

Weekend Nails: squares & dots~

Sorry if im not able to update my blog regularly. I have loads of classes & i spend my free time mostly doing researches. I do take lots of pictures for the posts that i plan to do but it's just accumulating because i don't have the time to blog anymore. I feel like half of my PC's memory are JPEG files already! LOL!

Anyway, this is actually my first nail art for the year 2011. For some reason i am having a hard time coming up with designs. I wonder where all my ideas before flew off to? *sigh* I hope that i'll be able to make lots of nail arts this year!

Not yet weekend, but i decided to publish this post already..hehe. Hoping that this would be a nice beginning to jumpstart my blogging mood!


As always, the choice of colors would be all up to you. I just decided to try out this combination for i haven't done this yet. Actually that's yellow & maroon nail polish but i guess the maroon looks more like a brown underneath the yellow base...

Enough with the ya-da ya-da & let's let the pictures do the talking from now...

1. Apply your base coat & base polish as well.


2. Then paint half of your nails with your choice of light-colored polish as a base for the design. It's better to start with the light colors as base in everything. You'll make the colors pop more! Let it dry completely. You can choose to have all of them with 1 design, i just experimented to see if it would look ok if i will do it randomly...LOL


3. Using a detailing brush or any brush that has a fine pointed tip (i actually love using my old eyeliner brush), draw lines like this so to act as a guide on what areas you will be shading to have that checkered effect. Try to draw lines as thinly as you can.


4. Then fill the squares with the dark colored polish....


5. So that it would look like this... I actually think it already looks pretty nice,ne?


6. Using a dotting tool (or just the tip of a bobby pin), create dots at the center of each square using the contrasting color for each.


7. Finish it by drawing a line where your design meets your base polish just to polish it off. In my case, since i have these cute colored small balls (on which i don't even know how to call it!), i decided to put it to good use.


Lining them up in a straight line is pretty difficult! hahaha! Look how uneven they are!


Now, if you also have these small balls & is planning to use it on your designs, i advise that you apply top coat before putting this because if you apply top coat after this, the color would somehow "melt" away. (-__-")

Again, im not a fan of nail stuff that protrudes so i'm not even sure if i will be using it again. But it looks cute,ne?

Well then , hope you will all have a great day!

Jaa ne~!
^_^

Saturday, January 15, 2011

Delon Cotton Rounds ~ the ultimate cotton rounds!

Up until im writing this post, im still unsure whether i should blog about cotton pads. This is just cotton for goodness sake! What's the difference of just buying a good ol' cotton to this? There is a big heck of a difference!

Why?

I'll tell you why i think this is the ultimate cotton rounds. As what i said before, i had tried this when we went on vacation in Subic, summer of last year. I bought it at Puregold & has long regretted not getting a bunch of them as back-ups. Yes, regret is the correct verb!

Let's take a look at it first...


It has 100 cotton round per pack. It retails for Php 119.75 at Landmark Makati. I know that it's way more expensive than the usual pack of cotton rounds. Heck, it's double the price of ordinary rounds but this is really worth it!


It's in a resealable bag.
I know that some cotton pads are also in a resealable bag, but this one is more sturdy. You know the resealable zippers that are usually found in Ziplock bags? This is almost as good as those! So you are sure that the cotton won't come pouring out if it "accidentally" popped open.


How many times have i accidentally sat or step on my cotton bags & because of air pressure the cotton would come out, exposed to all the dirty things in the environment?! I can't even count it for im so clumsy that it's a part of me already...LOL! So, yes, this is good for OC people out there! You can be sure that your babies are all locked up clean in this bag.

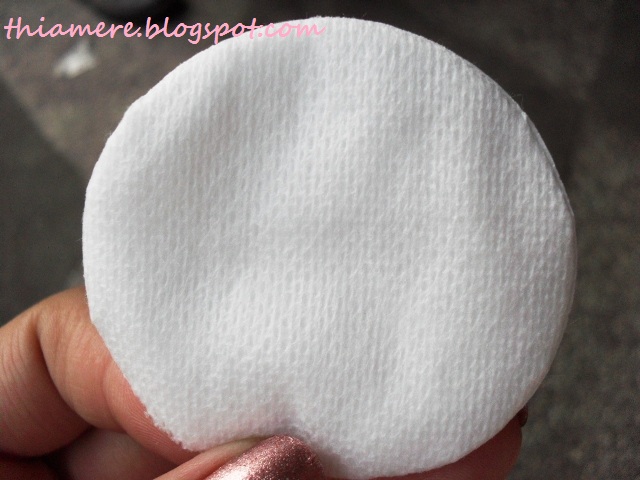
It's lint-free!~ It has this cotton mesh sitting at the top that prevents lint from surfacing.


If you do nail arts, it's a must to have a cotton soaked with polish remover in cleaning your orange stick, nail pusher or dotting tool right next to you. I had a lot of good designs that got totally trashed all because lints kept on clinging to my tools...transferring to my wet nails therefore ruining my design that i worked so hard for. Grrrrrr!!!! Kuyashii~! Annoying!

So, a lint-free cotton round is what i am really looking for!

Also when i remove mascara & eye make-up. Sometimes, i would have a couple of lint stuck to my eye balls because im trying to remove the liner that i apply on my waterline. Yes, i know that sounds disgusting, but it's true! I mean sometimes even Q-tips would have lint sticking out which makes removing my waterline-liner really tricky to remove.

But not with Delon, it won't leave lints! It might.... if you start "peeling" it layer by layer if you are maximizing the use of each pad, but not if you just use it as is. I'll tell you about the "peeling" later.

It says there that it has premium sealed edges, which is love!


See how you can easily distinguish each round from one another?


I have destroyed a couple of good pads just because the edges are fluffed out & i don't know where the edges are. This is also thick! Each pad is packed with enough cotton to absorb any liquids that you apply. Again, with it being thick, you can maximize it by just "peeling" each layer after it's already full of dirt or anything. This is when lints can happen...


Would you believe me if i say that i only use THAT ONE cotton pad in removing nail polish for all 10 of my fingernails?! Well, if you don't, then you can even drop by here at my house & give you a live demo..LOL! This is what i was saying about maximizing each cotton pad. How many cotton pads do you use in removing nail polish in all 10 fingernails?

So, this pad is really perfect in make-up removal!

I have tried those square cotton pads, but they're a pain to work with because they're so thin that if you accidentally put a big amount of liquid product on it & you apply pressure, it would just dribble down on your fingers.Hate that!

Each pad has that mesh sitting on the top which is actually good in exfoliating especially when you apply astringents or toners!


If you don't like that mesh exfoliator, then you can just use the other side of the cotton.


You can use this based on your preference!


This pad is definitely stronger than your average cotton rounds!
^_~

I guess there's also a bonus in each pad for it says that it has Aloe Vera & Pro Vitamin B5. It says at the package that it's not tested on animals, hypoallergenic (wow! i guess there are some people who are allergic to cotton?!LOL).

Let's do a summary
PROS:
  • sealed edges
  • has a mesh for exfoliating
  • has a good resealable bag
  • thick pad that is really absorbent
  • you can maximize the use of each pads!
  • locally available (im just not sure if it's available in other areas as well)
CONS:
  •  more expensive than regular cotton rounds
I'm so happy that i was able to buy a pack here in Manila. I don't mind going at Landmark Makati just for this cotton because it is sooooooooooooo worth it! If you know any place where this is sold please tell me too. I hope that this is available at Landmark Trinoma too!

I never realize that i would be blogging about cottons, though i know that it is a must for us, but then this is something worth blogging for~!

Hope y'all have a good weekend!
Jaa ne~!
^_^

Believe in B.liv's Dump Off Drawn! I do!

I was contacted by B.liv weeks ago to try out their products. I have been so lazy in applying any skin care products lately that I can alrea...