Showing posts with label nail arts. Show all posts

Monday, July 25, 2011

your nail deserves the best!

I love nail arts... most likely you, my reader, also has a passion for nail arts as well.
Kaya nyo nga binabasa blog ko e...LOL! (That is why you are reading my blog.)
Why not,right?
We use our hand to gesticulate & having an awesome-looking nails definitely adds up.

Rhinestones add an extra oomph! to the nail design. For those who have been using rhinestones, i know that the issues when using it is that that they lose their luster once you applied top coat... Am i right?

Not all rhinestones are like that,mind you...
There are some rhinestones that i have tried where they will still retain their luster with a top coat it's just that when you remove it & the polish remover touches it then it loses its luster so you will have to throw it away already. But that's a good rhinestone already!

The rhinestones that i have tried often belongs either in these 2 categories:
A - looks dull when you applied topcoat (the bad type)
B - doesn't lose luster when you apply top coat (the good type)

I have gone through a couple of rhinestone wheels but "ditching" them in the end because they fall in the former category. They will lose their luster so it's not good when using it in nail arts but i still keep them in case i would have something that i want to decorate like my scrapbook or when i make some handmade hairclips, they are perfect!

But not for your nails...
You apply rhinestones because you want to have your own nail blings but this type is an utter failure!
*rolls eyes*

It's pretty hard to look for the ones in the latter category.
I'm just lucky that i was able to own a couple of rhinestones like so.

Now comes Swarovski flatbacks....
I'm pretty sure you are all familiar with Swarovski. There is something about Swarovski that sets it apart from other common glass crystals. If you own some jewelries that got Swarovski you'll know how shiny it is... just imagine that on your nails!

It's marvelous!
Look at this picture.... I'm sure you know what is the Swarovski there,right?


It's very obvious! It is the bottom left one, of course.
Can you see the luster in it as oppose to the usual resin rhinestone?

This is how it looks like with a very thick blob of top coat on...


See how the other resin ones pale in comparison to the luster of this Swarovski rhinestone?
Doesn't it speak for itself already?

Add the fact that this Swarovski from BornPrettyStore is, according to their term, described as "foiled back" which i gather uses foil as their backing to ensure that they have superior glitz, glamour & shine, just makes it too irresistible!


See the back?
I know that most rhinestones just have that smooth shiny back, this one is really just like a foil!

One major advantage of Swarovski rhinestones over ordinary resin rhinestones is that Swarovski is reusable!
You don't believe me? Well, take a look at my nail art...


See that rhinestone at the ring finger?
I already added 2 coats of top coat in it but you can still see how shiny it is! There is really something different about it... once light hits my nail, it just shines! This rhinestone adds bling to my somewhat boring color,ne?

I'll make a tutorial for this nail art maybe next week, i just want to get this post about Swarovski over & done with first... hehe

Anyway, the main point of this is to see how it looks like after i removed it.


This is it after i submerged it completely in my polish remover, i swirled it around to completely remove any remaining top coat on it...

So, i'll let you guess...
What do you think is the one that i have used & submerged in polish remover? The other one is just new
Is it A or B?


They look the same,right?
It is actually A that i have used but there is no obvious difference between the two!

This is just a proof that you can reuse this rhinestone over & over again. It could even last for a lifetime with proper care & maintenance.

This is definitely a good investment as opposed to continually new set of resin rhinestones every now & then.
I know what you are thinking... "It's expensive! I don't have the money to buy that".
Let's do a little comparison, shall we to see how this fares with the regular rhinestone set available online & the ones that i have seen being sold in our local stores...

A set of rhinestones in a wheel being sold locally is priced somewhere from Php 150-300 per wheel.
Let's just go for the cheapest which is Php 150 & convert it to $3 (this is not counting if what you are getting is actually an A rhinestone (the bad one) or the B one (the better).

It has different colored stones, which would enable you to mix & match depending on your nail art for that day. Then again, this is just for one time use.

The Swarovski on the other hand is $7.27 for 144 pieces.
It is reusable & the luster of this rhinestone is amazing!

I know that it is quite steep but then you are paying for a very high-quality rhinestones & you can reuse it over & over again. It would prove to be cheaper in the long run! If you love rhinestones & have that bling in your nails then this is a good investment. Once you bought it you won't have to buy any rhinestones ever (if you take good care of it)! You'll be hooked with how awesome this looks on your nails!

If you want your nails to be all glittery & sparkly, then use the best rhinestone & it will definitely add that OOMPH! & more!
hahaha

BornPretty has different assortments of Swarovski rhinestones from different colors & sizes. I know for a fact that this store has the cheapest Swarovski flatbacks because i made a research months & months ago. That is why, if you want to try this head on over to their website to take a look.

You can use the coupon code that you can see at left side of my blog for a 10% off.

Hope you all are enjoying the day,sweeties!
Jaa ne~!
^_^


ps:
product sent as a sample. I did not receive any monetary consideration for this post. Opinions shared is personal view & is no way influenced by the company.

Saturday, June 18, 2011

Weekend Nails:Hime-inspired pinks & dots

This is really a Hime-inspired nail art, except that i don't have the guts to put in lots of rhinestones or acrylic decorations. I'm not really a fan of nail art, you see, but that didn't stop me from lusting over those uber cute Hime nails. Hime, by the way, stands for Princess in Japanese. So it basically means Princess Nails! hahaha!

Basically, the point of Hime nails is to don a very girly-looking nail design so it's more of pinks & iridescent polishes. Love love love looking at deco hime-nails! I would love to try it for once but i have this habit of letting my hair loose so i keep on running my hands on  it every now & then. It would be very impractical of me to don a 3d nail art if i will keep on doing that,ne?


What's fun about this is that you can add more decorations based on your preference. I just added a small one by stamping that ribbon image then topping it off with a pink pearl.

You can add rhinestones all over the round edges of the nail (the lunula part) for that extra oomph!

This is not hard to do. The only annoying part is the waiting time... (-__-"). You know how impatient i get when i do my nail arts. I hate waiting for polishes to dry so i most often put Seche Vite already on my base color so i cut my waiting time in 90%!

By the way, these are my real nails. I hate using fake nails because they feel heavy.
^_~

Materials needed:


  • hot pink polish - i used The Face Shop's PK 106 (its freakin' awesome!love it!)
  • black polish
  • dotting tool/bobby pin
  • white polish for dotting (you can use pink if you want to)
  • top & base coat
  • sheer iridescent pink polish (optional)
  • stamping materials (optional)
  • rhinestones/glitters (optional)

1. Let's first make a very obvious lunula for that edgy-look. I applied a pink iridescent polish as my main base because i like how it reflects the light every time i move my fingers. Apply your polish at the base making a V-shaped indentation like the 1st pic. Then join the edges together by making a small curve. You can also do this when you are making french-tipped manicure. This is way easier compare to putting sticky tapes (if you don't have a french-tip sticker).


2. Using the same procedure, use the black polish to the top half of your nail like in the pic. Wait until it dries. Sorry for the mess...


3. Then add dots on the black part only using a white polish.


4. Decorate your nails on how simple/blingy you want it to be. As what i said you can put rhinestones or acrylic ribbons/flowers based on your preference. Then add top coat!


See?
This is not hard to do!

I hope you'll try & make this design as well because it's so fun to look at!

Have a great weekend,hunnies!
Jaa ne~!
^_^

ps:
I arranged the category of my nail art posts already. So it won't be hard to look for it. Feel free to check out the different labels of each. I classified it into their colors/designs. This certain nail design falls in the Nail Art-Pinks & Nail Art-Dots

Sunday, June 12, 2011

Weekend Nails:Rose Curlicue

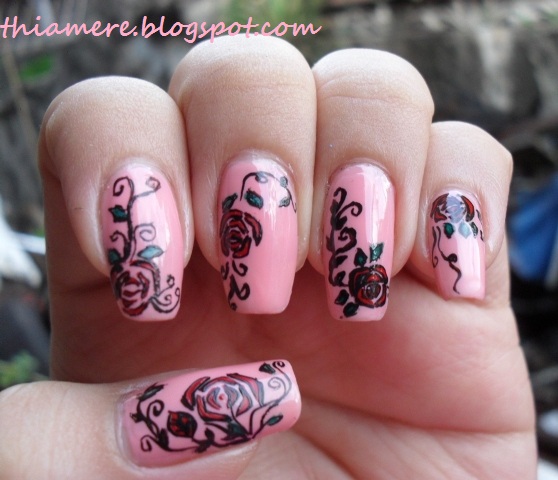
 This is one of my most favorite flower design that i have ever made!


I spent a long time completing this design but it's so worth it because it's quite unique & looks so girly!

I used acrylic in this design. It's impossible to use polish to create intricate designs like this. Actually it's not really that hard to create this design. If you have a steady hand, you can do this too!

What's ironic about this is that i didn't use a nail art brush..i used my artist brush!


See the number of the brush?
It's 4/0... the tip of the bristle is very fine that it's possible to make very detailed line like this design.
Make sure you read the tip that i had at the bottom of the post if you are planning to do this design too.

Let's get on with the tutorial~!

1. Pick your base color... choose a light/pastel color to make your design truly pop!
I used The Face Shop's PK110 as my base. Sorry, i forgot to take a pic of it on my nail..hehe

 2. To make the rose design, lightly dip the tip of the brush on the red (crimson red) acrylic. Then make a small curved line like shown in the picture. You then, trace the red line using black acrylic to give it a well-defined look.


Here's a bigger & closer look so you'll see how the design of the rose is...


You don't need to be in a hurry. Patience & Steady hand is the key in making this nail art a success!


3. Using green (phtalocyanine green) acrylic, add some leaves if you want to. You also have to use black acrylic to define the shape of the leaves.


4. Last but not the least, using black acrylic, make some random curlicue design on the sides/top of the rose!


5. Apply top coat then sit back & admire your nail art!


You can just stick with one design if you want to. It's just that i prefer to have different designs on each nails just for it to look edgy! hahaha!

I love this design!
Too bad that my left hand can not make such detailed work like this so it's only my left nails that has this..LOL! In time, my left hand would be able to make detailed design too.. i just wonder when would that be?! hahaha!

Anyway, i hope you are enjoying your weekend!
Jaa ne~!
^_^


Nail art tips:
-If you are doing thin lines it's better to just dip the tip of your bristles on the acrylic, not dipping half of the whole bristle..just the tip!
-You can wet your acrylic with water if you find the consistency of it too thick for your liking. Adding water will make the acrylic thin so you'll be able to work with it easily.
-If you find your acrylic drying, just add a spritz of water on it. What's great about acrylic is that you can just wipe it away/rinse it with water if you made a mistake.

Saturday, June 04, 2011

Weekend Nails:Lonesome Flower

I have been wanting to don yellow nails for a couple of weeks now but since i hauled a lot of polishes last week i wasn't able to. This week i tried to go for yellow polish but for some reason i find it quite boring so i just decided to just put a single flower to break the monotony of it.


Sorry about the poor lighting because i did this late afternoon. I finished this when the sun had already set so i just took a pic of it inside the house. This is very quick to do. The top coat made the brown acrylic look dull because it's still wet but when it dried it already looked glossy.

This is one kind of flower design on which nail polish is better used rather than acrylic. Though i used acrylic in this tutorial for i wasn't at home at that time, only my acrylic kit. This is quite easy so even if you are a beginner when it comes to doing nails arts, you can do this.

Let's start with the tutorial:

1. Choose your own base color... in my case,, it's yellow.


2. With your dotting tool, the smallest one, make a flower. you can do this by just dragging your dotting tool inward to create a petal as soon as you lay it on the nail surface. You can put your flower anywhere, i just put mine on the side since i still want my polish to show.


3. Then to create the stem & leaves, use your detailing brush. I used green acrylic but i think you can just a green nail art pen if you have it.


4. With brown polish/acrylic apply it using short strokes so that it would have an uneven look so that it won't look too cartoon-y.


5. Finish it off by applying an orange dot in the middle of the flower.


Apply top coat & you're done.


A quick nail art to end the week.


Hope you are enjoying your weekend!
Jaa ne~!
^_^

Tuesday, April 19, 2011

Weekend Nails:Funky Zigzag for short nails

I'm sure that many of you who can't have long nails would also want to have great nail designs. There are some designs that actually looks good in short nails. This design is one of them. It would look ok for long nails but it's a lot cuter on short nails.


Sorry for the messy-looking nails because i took this pic right after i did it before my top coat so i haven't cleaned the edges yet.

Choose your very own colors. This design is based on your own preference, you can have as many colors as you want or even just opt for a duo color...it's up to you!

Since it's summer, i decided to opt for bright colors... bright pink, yellow, green & orange.

Enough with the talk...let's get to the tutorial:

1. Apply your base color/s. Choose the light color over the dark as base color so that the color will not change once you apply the second color.


2. Draw a zigzag pattern in the middle of your nail from top to bottom. I use a liner brush & yellow acrylic to draw the pattern on. Feel free to use anything that you feel like using. You can even use a marker with very fine tip, using a dotting line. Anyway, this is just a guide so it doesn't matter as long as you have a pattern to work on.


3. Then carefully apply your second color. You can even use the brush in your nail polish. If you're not confident in using it then you can use a smaller brush for that.


5. Wait for it to dry before defining the line in between. You wouldn't want to ruin the edge that you have because you're too impatient. You can use a glitter polish or even just a black or white polish in tracing the line. I just used a nail striping tape in this. Took me a long time finishing it but then it looks great!


6. Finish it off with a glossy top coat!

Then time to admire your nails!
This is perfect for summer~!

Hope you all have a great day!
Jaa ne~
^_^

Wednesday, March 30, 2011

Weekend Nails:sunny-flower!

Yep!
Another sunflower nail art!

Sunflower is my 2nd favorite flower, with tulip being the first. I can feel the heat of the summer here in the Philippines & i always relate summer to sunflower so to jump-start my summer nail tutorials, i decided to go with this design first. I already had a sunflower nails but it's not as bright & fun as i want it to be.

This would be perfect if you are longing for summer (especially for those in places where it's still cold, like New York) & would want to bring the sun right at your fingertips... or nail tips on this matter...LOL!
^_~


I think it's better if you go for an off-white/light neutral polish instead of a white polish so that the flower would  stand-out. Yep, it's better if you do it on a different background especially because the flower petals are white & yellow.

I used acrylic in this nail design... white, yellow, green & black also a detailing brush as well. So let's start with the tutorial..

1. Paint random circles on your nails, this will act as the middle of the flower. I used yellow as an underbase so that it won't have a strong green, plus the combination of yellow & green is pretty nice as well.


2. Then using white acrylic, i made flower petals surrounding the circles. You don't need to worry if it's not neat or if you accidentally drew over the yellow circles. These are just under bases to make your colors stand out the more.


3. Then, using the yellow acrylics, draw random yellow streaks inside the white petals. you don't need to cover the whole petals, just the inside of it. I said streak because you just need a small yellow color to give life to the petals.


4. Then apply green acrylic on the middle of the flower. Even if you use a pthalocyanine green it won't be very dark because the yellow color would contrast it. You don't need to cover the whole yellow. actually uou can leave some yellow parts as well for added color combination.


5. For the finishing touch to give definition to our sunflower you just need to add dots of black on the surrounding of the middle. Drawing a line would make it look somehow too...uhhh..."drawn"...i can't describe it. But just trust me on this... dots is better in this case..hehe


Then wait for it to dry before you apply your top coat!


You're ready to greet your summer!
^_^

Sorry if i wasn't able to do nail art posts for quite sometime.
Actually i had already cut my nails short because i broke my ring fingernail. I know i could just repair it using nail glue & tea bag but since i have bad nail stains i figure that it would be better to just let it grow naturally at the same time it would give my nails enough time to get back to its natural state.

Anyway, hope you like this one. it's not as hard as it looks.
Do tell me if you were able to make the same design.

Have a great evening/day!
Jaa me~!
^_~

Sunday, February 27, 2011

upcoming nail post:summer scenes + meet up with my nail art group

Yes, it's summer scenes. I can already feel summer coming here in the Philippines!

which means not just 1 but 5 designs!
hahaha!

what was i thinking when i made my nails different from each other?! Well, actually this is my nail art contest entry..hehe


I used acrylic in this because when i did my last post, which is my spring-themed nail post, it just dawned on me how much i missed painting! What i really love about painting is how you are able to produce different colors by mixing 2 or three colors together. I admit that often times i find it hard to get the exact color of what i used in my previous works but i guess that's the challenge of painting.

I'll do a tutorial for all of them. Don't worry for it's easy to actually do it. The only thing that may be hard is blending out colors, you can use nail polish for these as well, it's just that acrylics are fast-dry so i can continue working without waiting for one layer to dry unlike using nail polish.

I did this last thursday but since my brother borrowed my camera because he went on a field trip so i wasn't able to do the step by step tutorial at that time, but it's ok. I know i can remake this.
^_~

I met with the members of our group a little while ago.


All of them are certified nail polish addicts! hahaha!
*ehem*
including me of course! I'm in the center of the pic so it means that i am also guilty! LOL

You don't think so?
Well, when Annie put out the nail polishes that she is selling we all squealed with delight!


Look at those stamping plates & fimo canes!

It was a very fun event for me, it's such a shame that i have to go home early because we have further engagement, but i'm sure that there will be a next time!

Well, i got myself the Del Sol Color Changing polish!


Dream come true for me~!
Then Annie also gave me free stencils! how fun!
Thanks, sis Annie!

Sis Thrizsha gave me my glow in the dark polish. I'm so gonna try it out! See the blue & green bottle? I also won her raffle! How fun!

I'll do a separate posts for the glow in the dark & del sol polish also for the things that i received from the event.

I had a great time,girls!
Until next meet up!

I'm really so excited tomorrow to be able to witness myself how Del Sol polish would actually change under the sun. I just hope i'll be able to fall asleep..LOL!

Hope that you are enjoying what's left of your weekend!
Have a great day/evening!

ps:
for pinays out there who want to buy OPI, Del Sol, Color Club, LA Girl, China Glaze polishes, Konad nail stamp plates, stencils, fimos, etc, feel free to drop Annie a message. She even have the OPI Shatter!

Sunday, February 20, 2011

Weekend Nails:time for spring~

Winter is almost over & i'm glad that my students are feeling a bit happier that it's not as cold anymore & it's not snowing that much. Since i live in a tropical country, i can't just imagine the feeling of being trapped in the house  because of heavy snow... plus the lingering coldness. I bet it must be quite hard,eh?

So to welcome the season, i decided to do a gradient green nail design with a hint of warmth on it.


Excuse the dry-looking cuticles, ladies.
I did this last night & i haven't cleaned the edges yet & there are still excess top coat at the edges especially the middle nails for i have to make sure that i seal the rhinestones in places.

I just bought a new set of acrylic paints because i don't like the consistency of my old acrylics anymore. They are already a bit dry, though i can still use it to paint but it's hard for nail designing. I'm glad that i saw a set that has 18 colors. It's a lot cheaper compare if you are going to buy them separately.

I haven't used acrylics that much when i do my nails for i prefer nail polishes, i guess i just had this thinking that anything that is used for painting should only be used in canvasses. LOL! Though i know that in some salons they use acrylic paints in nail arts. So why not practice with acrylics now! My nails are my canvas, albeit a really small one!

I decided to so flower designed nails for i haven't had any luck when it comes to flowers. I have only received 2 bouquets of flowers for my entire 26 years of living... How pathetic,huh? That's also the reason why i don't like Valentines... you can ask Sis Pammy why. XD

I guess that's why i don't usually do intricate flowery design. I'm still basically a beginner when it comes to flower designs, except for those flower dots. Sorry if this design looks messy (-__-")

For those who are also a beginner in flower designing, Let's all do our best!
Watashi mo Gambarimassu!
\(^_^)/

It's also been a while since i did gradient nails so i decided to do a green gradient underneath. Sponging method is really so easy to do. Let's start with the tutorial!

Materials needed:


  • base & top coat
  • base color - optional - you can even go for bare nails since this will have a gradient tip
  • sponge
  • dotting tool
  • nail brushes - pointed filbert brush & liner brush - optional
  • acrylics - titanium white, orange, phthalocyanine green (light green & viridian hue is optional)
  • rhinestones - optional
1. After base coat, apply your base color. As what i said, this is optional, you can just skip it but since my nails have a very bad nail stains (i'll let you know why after a couple of days) so i need to apply a nude nail polish to cover it up.


2. Then load up your sponge with green acrylic so you can start sponging. Start with the lightest color first, in my case, it's the light green. If you don't have a light green acrylic, then just make your own by mixing titanium white & phthalocyanine green. Adjust the color until you achieve a light green. Sponge your own at about 3/4 of your nail. 

After the light green, i applied the viridian hue (again, feel free to mix your own color, it's juts a tad bit darker than light green, so just add a bit of phthalocyanine green on your light green mixture). After that would be the phthalocyanine green alone at the edge 


Sponging tip:
When you apply the acrylic on your sponge, press it first on a paper so that the acrylics would be distributed evenly... continue pressing until you get the desired color. You don't want a big glob of acrylic sitting on one side of your nail because the color concentration would be too high in that area. It's better to start a soft wash of color & just work your way in compare to starting with a heavy color. 


I prefer make-up sponge when i do the sponging method because it's dense enough to achieve a not-too-obvious sponge holes compare to the usual sea sponge that has a lot of holes on them. But the sea sponge design is also good, it's just that when i want a real gradient look then i go for make-up sponges.

3. Then using the pointed filbert brush, we will have to make flowers. Dip the tip in titanium white acrylic. 


Now, when you work with acrylics & this rule applies to all brushes as well, Just use the tip as much as you can. If you get the acrylic on the ferrule, it would be hard to remove it. When it dries inside, it could affect the density of your brush. I have destroyed a good number of brushes when i was still painting all because i can't remove the remaining acrylics left on the ferrule. I'll do a separate post about it when i talked about nail art brushes.

4. With steady hands, make flowers on the side/middle/top/edge of your nails like so...


Just be random. What makes this nail design fun is that you're not bound by a specific design since all of your nails has the same base & you have the same colors  in every nails so you can just have fun with the flower & dot placements!

5. When the flowers are done, we can add a bit of warmth on it using the orange acrylic. just apply it on the inside of the flower.


6. Then add dots using a dotting tool


7. Finish it off with rhinestones that you put in the middle of the flowers & your favorite top coat of course!


There ya go!

I am actually digging the gradient green. My flowers still look like a disaster, but i'm sure with practice i'll be able to make it better. I still have a long way to go.. mada mada!

Hope you like it.

Have a great Sunday!
Jaa ne~!
^_^

ps:
Giveaway still ongoing, click HERE to know how to join.

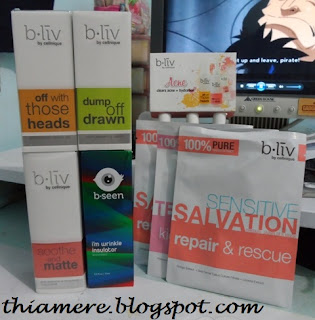
Believe in B.liv's Dump Off Drawn! I do!

I was contacted by B.liv weeks ago to try out their products. I have been so lazy in applying any skin care products lately that I can alrea...