Showing posts with label nail art-colored. Show all posts

Friday, May 03, 2013

Weekend Nails:3d Cartoon Nail

A short post to end the work week & to welcome the weekend~

It's been a while since i did my nails & frankly it's not on my priority list now but then i can't help myself & do  a version of it when i saw it on instagram.


How cute is that?!
It looks like drawn nails..haha!
How fun!

You just need a light colored base color, black nail art pen/acrylic, white nail art pen/acrylic & a matte top coat.

On with the picture tutorial.
I decided to use a different base because when i did it the first time i forgot to do a tutorial.
This time i used Sansan's Purple Breeze as the base. 
Just click it for a larger image..


Easy as pie,no?
I bet that you can also do this on your own.


Hope to see your version of this cute & fun nail art that is perfect for short nails~

Have a happy weekend!
Jaa ne~!
^_^

Monday, January 14, 2013

random nail arts the past couple of weeks~

I've been seriously trying to get my blogging mojo back. 
In fact, I've been working at it for days now. I have been staring at my draft for like a week now but for some reason i just can't seem to write anything worth reading,i guess.
*sigh*

I know i've been on several blogging hiatus last year & i would want to at least get on back to blogging (maybe not actively) as much as i can. I just can't seem to find a way on how to pick up where i left off.

Oh, my....
I'm sure my fellow bloggers know this so tell me how you, guys, get on blogging after feeling this "blogging block"?

It's like the feeling of wanting to do something & being in the mood of actually doing it are 2 completely different things now. I feel so alien writing things.. lol!

Anyway,i figured that i'll just share with you some of the nail arts that i had done the past couple of weeks.
This one is a personal favorite~


I love the song Dango Daikazoku. It's just so cute!
So when we had the song-inspired nail art on our group,i knew that i just had to do this.
It's just so adorable! Love this to bits. hihihihi

Then to contradict the cuteness of the dango nail art, this goth nail art is perfect for that.


I'm not really into these types but i guess somehow it is a refreshing change from the usual girly nail arts that i love to do so much. hehehe!

Then another sparkly & flirty nail art that i did last week...


I did this after the goth nail art.
I just feel like i wanna see something girly & fun after the goth nail art & this was perfect!
The glitters on this nail art cheered me up instantly. hehehe

Last but not the least...
My nail art up until this morning


I just had to use Floam once more.. but this time without using glue as base coat.
And boy,was that stupid or just plain dumb? hehehe
It was the hardest glitter polish that i had ever had the experience to remove. Now i know why Floam's rating wasn't 5 star as i thought it should have been.

If you ever own this & would want to sport this polish, just do yourself a favor & use glue as base coat. It'll save you a hell of a time, polish remover & effort when you wanted to remove it already.

Well, let's hope that somehow i'll be able to go back to blogging tomorrow.
Have a great day,hunnies!
Jaa ne~!
^_^

Friday, August 24, 2012

BFF Challenge:City

I went all out for my nail art for this challenge & i am on time this time! hahahaha!

I was really planning to do it last black & white because i really adore black & white combo but i was sick at that time. I already had everything planned out... such a shame. So this time, armed with my acrylics & faux nails, i set out to paint Manila, the capital of my country.


dum! dum! dum!
*the song Manila playing on the background*
Manila, Manila.
I keep coming back to Manila.
Simply no place like Manila.
Manila, I'm coming home!

I don't live in Manila, mind you. The city where i live in belong in the Metropolitan Manila though. Manila is just 30minutes away from where i live so i can go there whenever i want to. Let me give you a tour of the city by my nails!

Manila Cathedral~


Officially known as Cathedral-Basilica of the Immaculate Conception & i just quoted Wiki there. .. hehehe
Located at the heart of Manila, this church has been one of my favorites. We mostly go here on Sundays when we are celebrating something special in the family, specifically birthdays!

Rizal Park


Commonly known as Luneta, a place that has a special mark in our history. The place where our national hero was executed thus igniting the revolution that freed our country from colonization.

People mostly flock the park for picnicking or just simply unwinding. I grew up going to Luneta together with my uncles & grandmother before. Last time i went here was together with bf just because i'm curious to see how it is.

Manila Bay


Watching the sunset has always been a pleasure especially if you are along the banks of Manila Bay. The myriad of colors displayed for everyone to see is a true beauty which is quite hard to capture on the camera.

Modes of transportation:
Jeepney


Tagged as the King of the road, i don't know if they are still considered as king of the road now.lol
I don't drive & im not even that tempted to learn how to drive. Why?
I might sound weird but i actually do enjoying riding the public transportation. There are fun & interesting things to see on a public transportation. I love riding the jeepney. I'm serious!

You know, one of my lifelong dream is actually to ride at the edge of the jeepney just holding on to the railings. When i told the bf about it, he laughed at me. I know it is funny but i would really love to try it. That also goes with having my hair shaved & selling balut at night. I have simple dreams. lol!

Kalesa


I am proud to say that i grew up in a time where riding kalesa is very common.
Kalesa is a horse carriage that was used way back when tricycles are not yet widely used. I remember my grandma taking me along the market with her big straw basket at hand. Line of kalesas would be waiting for passengers from their trip to market. I love love love sitting at the front where i get to sit beside the Kutsero (the kalesa driver), on this plank of wood that serves as a chair.

You can still see few kalesa's at select places in Manila.
It costs way too much than before but the experience is something!

I tried writing in cursive. I know it's not perfect but it's so hard to achieve perfection if you are just using a brush, but i tried.hehe


So, what do you think?
Interesting enough to try visiting Manila?

You can check out these ladies doing the same challenge with me:
Sally Of Nail Pron

Hope you all are having a great day!
Jaa ne~!
^_^

Sunday, August 05, 2012

BFF Challenge: Neons + giveaway winners

OMG!
I can't believe it... i've been slacking this week. But i have a reason for that. I guess this rainy season is just getting the better part of me because i feel so lazy & it's like my creative juice had been zapped dry all of a sudden.

The challenge this theme is Neon by Kerrie~


I went over to my stash & i was surprised to know that i only have a couple of them. 1 violet, 2 greens & 3 pinks. I don't even have the usual yellow one. tsk!


I have tried doing 3 neon nail arts for the past couple of days but i can't seem to make the colors work together. Among the 3 that i've done this is the one that looked ok at least. I'm still not satisfied with it, mind you, but this will do. I hope that the weather will clear up by tomorrow because it is seriously affecting me.


Ill tell the details about how i made this nail art sometime soon but not now because i'm really feeling that giddy.
:(

I need the King Sun!
hahahaha!

You can check out these ladies doing the same challenge with me:

On to the second part, the HBC giveaway winners.
Sorry it took me a while.
Winner 1:
GFC: Ida
FB: Ida Lamban de Roma
Email: idalorena@gmail.com
Twitter: MakeUpnBeautyPH (I tweeted about the giveaway there)
My major skin care woe is acne. =/ Dry skin, blackheads, and hyperpigmenation I can deal with, but acne flat out sucks. I thought my acne problem was over, but recently it's come back with a vengeance! I just hate it but try not to think too much about it or let it get me down. It's difficult to ignore it completely though because I review beauty products almost everyday.
So if I could make a wish to the Beauty Fairy, it would be for me, and for my daughter, when she's in her teens na, to never have acne! If that were to come true, I'd be pretty happy. :)

Winner 2:
Email: quiamoi_tres@yahoo.com
Facebook: Vintagekawaii Onlineshop
Twitter: @quiam
GFC: notyourordinaryteacher
Tweet: https://twitter.com/quiam/stat...
FB post: https://www.facebook.com/vinta...
I am bothered by the dark spots caused by my pimples and chickenpox scars. Beauty Fairy, please grant my wish and give me
H-Hortaleza, M.D. clear soaps
B-Beauty Certificates for Diamond Peel
C-clear and smooth skin :)

Congrats,hunnies!
^_^
Please email me with your contact details.

Hope that this week would be a better week for us.
Jaa ne~!

Saturday, July 28, 2012

BFF Challenge:80's nail art

80's nail art chosen by Bec...
whoo hoo!
I haven't done retro, well,except if you'll count my retro dots (which i don't!) so this theme is also challenging as well.

I had spent lots of hours researching what designs i could do but for some reason i can't find any. So i wracked my brains up thinking of 80's related stuff. The things that kept on popping on my mind were Madonna, Michael Jackson, Kylie Minogue, Chaka Khan, etc...
Then i remember that people love disco-ing (is that a word?) to these tunes so it's disco fever days!

Hence i came up with disco balls!


This is an easy nail art but i have to say that it takes a lot of work!
You have to perfectly line the glitters to make sure that they will look like a disco ball.

But this is a very fun nail art!


See?
Look at my thumb & pinkie!
Love holo glitters!


Oh, if you're planning to do this nail art, i used hexagon-shaped glitters. Start at the center,ok? So that everything is all lined up nice & even~

I did it. You can do it too!

It takes a while to finish but believe me when i say that the outcome is ridiculously beautiful!
Pop in your hot pants, fluff out your hair then strut your stuff!
*Kylie Minogue's Lucky playing in the background*
Now time to party!

You can check out these ladies doing the same challenge with me:

Hope you all are having a great day!
Jaa ne~!
^_^

Don't forget to join my ongoing giveaway,ok? CLICK HERE

Thursday, July 19, 2012

BFF Challenge:Striping Tape Mani

Another nail art challenge for this week. The theme... Striping Mani!
This theme was chosen by Pram!
I have tried doing a mani using striping tape before. You can take a look HERE and HERE.
But this time,it's a completely different design but still using the tape. Here is my nail art for this challenge.

A Gradient Striping Mani design~
(for nubbin nails!haha!)


Another design exclusive for short nails~ Yay for that!
See? You don't have any excuse for not having chic nails because of the nail length.

It's up to you what colors you'll be using but for this exact design, i choose
pinky - lilac to indigo
ring - baby blue to navy blue
middle - pink to red
pointer - mint green to teal
thumb - gold to bronze (refer to the pic below)

Sorry about the tut pics.
I still haven't got the time to have my cam repaired so the macro shots are a bit awful.
So bear with it. As usual, i used a different color on my tutorial so that you'll be able to clearly see it.

So,here's the process:
1. Apply a neutral base color. The palest color that you can find so to give a good start for your mani. Since this is a nail wheel so i didn't bother applying any.
2. With the lightest color on the shade that you choose apply varnish, make sure that you have enough space (like 1/5) for your 1st tape to be put on. It's ok if you will not paint the whole nail (which will be better)  because you don't have to wait too long for it to dry.
3. Once the 1st layer is dry, time to apply the 2nd color. Again,make sure that you leave a space for the striping tape to go into.
4-5. Repeat the same process until you've used all the shades that you have. See? this one is better for short nails unless you have great shade selection that you can go from the palest shade to the darkest.
6. Cut your tape into strips.
7. Apply the tapes like in the picture.
8. Make sure they are evenly applied.
9. Then cover the whole nail with your choice of polish. Black is the best choice,really. I just decided to use yellow so that it's easier to see because im having camera troubles.hehe
10. As soon as you finish step 9, you immediately take the tapes off. It's harder to take it off once it's dry & it will just ruin the whole look so you have to take the tapes off as soon as you are done with step 9.

Let dry.apply top coat then voila!
You can do this horizontal or vertical or even random. The choice is completely up to you!


I'm sorry about the thumb. I messed it right when i was snapping pictures already.
I plan to do it again but got lazy because the drying time for this mani takes a while.
I got my striping tape from KKCenterhk.com or click HERE.

There you go~
Hope you'll give this one a try!
No acrylics for this,no? hehehe

Next challenge would be about books!
Now, this is challenging because i have a lot of books & choosing just one won't be enough for me.haha!
In fact, im thinking of starting a blog post about books. I think it'll be fun to connect with you, guys, on a different way.

You can check out these ladies doing the same challenge with me:


Have a great day, y'all!
Jaa ne~!
^_^

Saturday, May 26, 2012

Weekend Nails: One Piece

Just a short nail art post...

I have been working on this nail art for quite sometime now. I started last thursday (i was even updating my facebook with pictures of my progress) but i just wasn't able to finish until a little while ago. The reason?

My perfectionist side keeps on telling me to work on it until i'm satisfied but then my practical side said that i don't have to since i'm gonna take it off after taking pics (which is true!haha). I really did try to copy them exactly like in the picture but it's so dang hard, especially Luffy senchou! I'm a One Piece fan & not being able to give justice to my favorite anime is somewhat depressing for me.

Anyway, i know deep down that i'm not really cut-out for portraits ever since i tried painting eons ago. haha! So i guess this will be my first & last time making a character nail art.

I'll still be sharing my mani though.
Presenting the Strawhat Guys (uh,without Brook...hehe)


I think i was able to get Franky & Usopp at least but not the 3 guys... to think that i like Sanji the most!
(-__-")


Gomen, Luffy Senchou TT_TT

Well, there you go.
Have a great day,hunnies!
jaa ne~!
^_^

Sunday, May 13, 2012

Weekend Nail: Customize Framed Nail Art

In my case, i choose a butterfly design so i call my design as Framed Butterfly. An easy-to-do nail art!


This design is yours to personalized. You can basically do any kind of designs that you want! You can use decals or stamps or freehand design. The choice is endless!

Mostly i do my nails on my own now, unlike before where i have to take pics every step of the way. If you notice, whenever i post my picture tutorial i just compile them in 1 picture to make it easier & also to save space. So, you may see a different design/color on the tutorial picture compare to the finished work. It also shows how you can customized any designs that i have made on your own personal preference.

The key to make this nail art stand out more is to choose contrasting colors. Though in this case, i wasn't able to since i just decided to make do with what i have on my nails when i did it. I used my Midnight Fantasy as a base.


Gosh,i love holo polishes! haha!
Don't we all?

Click the picture for a bigger image.


1. Start with your choice of base. This time i choose a pink holo base (my own franken too). You can choose glittery bases too! I'm sure it's gonna look fab!
2. Make a wide rectangle (for long nails or square for short nails) with your choice of frame color. Choose one that is in contrast with your base color, or any color you prefer.
3. Once your rectangle (or square) is ok, then apply the color outside the shape to make a frame like in number 3.
4. Apply your design. I choose a Hello Kitty decal just because my base is pink. You can use decals, stamps, fimo or freehand design on the rectangle. Just make sure that you don't crowd your design near the frame.
5. In my case, i painted swirls on the edge of my shape. If you are not confident enough in doing swirls by hand, you can just put dots (on the edges of the frame or on the frame itself), big or small lines (vertical or horizontals), hearts, etc. Again, it's your choice. This is entirely up to you.
6. Then of course, make sure you apply top coat!

Voila!
Your very own customized nail art!


You don't need to be a professional to do this, with a nail art pen & decals, you can have professional looking nails in no time!

This is a cute nail art this Mother's Day,no?
Happy Mother's Day to all moms out there!

Have a happy celebration!
Jaa ne~!
^_^

Saturday, December 31, 2011

Weekend Nails:Checkered Pastel

I can't believe that 2011 is over & done with!
Is it already 2012?
hahaha!

Anyway, i'll be posting my last weekend nail for this year. I have only a couple of nail art tutorials for the past couple of months & i apologize for that. I don't even have a Christmas nail art. So here is to hoping that i will be able to make up for not being able to do nail arts for you.

I saw this design on the Nail Up! magazine for the year 2012. I was drawn with how cheery & fun this design looks like so i thought that i would recreate it for you,ladies. I hope that with this colorful nail art, the new year will bring forth good luck to all of us!


You can tweak this design with your choice of color. I just think that pastel colors are so adorable!
It's also your choice if you are going to do a freehand drawing of ribbon or anything to add a charm, or maybe just use a decal. I just stamped a ribbon on it.


Things needed:

  • base/top coat
  • your choice of colors (acrylics or polishes)
  • brushes (detailing & liner brush)
  • glitter polish
  • nail stamps (or decals)
  • star glittered polish (optional)

Click the pic for a bigger image...


1. Apply your base coat & choose a white base color so that the colors will pop.
2. Make a checkered pattern using a light colored acrylic to serve as a guide. Make sure that they are equal because the lines at the sides would be your guide for the shape of your lunula.
3. Apply additional lines like so to make it equal.
4. When you fill in the squares, start with the lighter color, in this case i started with yellow....
5. Then pink... You can play with the color application in the pattern if you want to. You can just add random colors too!
6. Green for additional coolness & playfulness!
7. Blue to bring in a strong & bold color.. but it should still be a pastel blue.
8. With your choice of color (pink in my case), carefully draw a curve to make the ends meet to finish the lunula.
9. Fill that space up with your color.
10. You can do an additional color application to make everything look neat before you start lining the edges.
11. Using a glitter polish, outline the lines to make the checkered pattern more flirty!
12. I applied 3 stars at the middle using the stars that i have on my glitter polish.
13. To finish it off, i stamped in a cute ribbon at the lunula to give it an extra cute factor!
14. Don't forget to top it off with a top coat!

Time to admire your cute nails!~

I love this design. I have received lots of compliment with this design!
I'm sure that you will too!
I would love to see your version of this nail art too!

Hope you all will have a good start for the year 2012.
I thank you all for the blog support that i received. I hope that you will continue supporting my blog for a long time.

Hope you all will have a prosperous new year!~
Akemashite Omedetou Gozaimasu!
Kotoshi mo yoroshiku onegaishimasu,ne? hihihi
^_^

Friday, September 02, 2011

Weekend Nails:Paint Splats

One of my favorite Kikay reader & friend, Kix, asked me if i can do a tutorial on paint splats. I have actually thought of trying our paint splats ever since Thriszha gave me a stamping plate that has paint splats too. I'm not really good in stamping so i still prefer freehand nail designs..hehe


This is a very fun nail art,don't you think?
I am liking it!
This is very easy to do! Perfect for beginners!

Materials needed:


  • your choice of polishes
  • dotting tool
The key to this design is to just be random. It doesn't need to follow a certain pattern. It's more fun if you do it randomly. Did you notice how the colors are just randomly put?

Click the pic for a larger step by step instruction...


Just start out with the lightest color first going to the more opaque ones. It's ok to overlap the lines because it just adds uniqueness to the design. Add random dots on any free space.

Don't forget to finish it with your favorite top coat!

This is perfect because tomorrow will be a fun day for me. I'll be going to the Cosmetics Expo at the SM Megamall tomorrow with my nail art group! Yay!

If you see me, don't hesitate to say hi.. Don't worry, I don't eat people...haha!
Hope you will have a great weekend,sweeties!
Jaa ne~!
^_^

ps:
Thank you for always reading my blog,Kix!
Gaya ng sabi ko before, i appreciate the chat messages, love & support.
Thanks for the gift of friendship din!
Mwah!
^_^

Tuesday, April 19, 2011

Weekend Nails:Funky Zigzag for short nails

I'm sure that many of you who can't have long nails would also want to have great nail designs. There are some designs that actually looks good in short nails. This design is one of them. It would look ok for long nails but it's a lot cuter on short nails.


Sorry for the messy-looking nails because i took this pic right after i did it before my top coat so i haven't cleaned the edges yet.

Choose your very own colors. This design is based on your own preference, you can have as many colors as you want or even just opt for a duo color...it's up to you!

Since it's summer, i decided to opt for bright colors... bright pink, yellow, green & orange.

Enough with the talk...let's get to the tutorial:

1. Apply your base color/s. Choose the light color over the dark as base color so that the color will not change once you apply the second color.


2. Draw a zigzag pattern in the middle of your nail from top to bottom. I use a liner brush & yellow acrylic to draw the pattern on. Feel free to use anything that you feel like using. You can even use a marker with very fine tip, using a dotting line. Anyway, this is just a guide so it doesn't matter as long as you have a pattern to work on.


3. Then carefully apply your second color. You can even use the brush in your nail polish. If you're not confident in using it then you can use a smaller brush for that.


5. Wait for it to dry before defining the line in between. You wouldn't want to ruin the edge that you have because you're too impatient. You can use a glitter polish or even just a black or white polish in tracing the line. I just used a nail striping tape in this. Took me a long time finishing it but then it looks great!


6. Finish it off with a glossy top coat!

Then time to admire your nails!
This is perfect for summer~!

Hope you all have a great day!
Jaa ne~
^_^

Saturday, September 04, 2010

Weekend Nails:Random line tip

An easy nail design which im sure everyone can do. This is good for those who are just starting out nail arts.


All you need to do is just to put different color of lines to make it look fun!
^_~

Bear with me,sweeties, i can't find my tripod the time that i made the tut so the pics look crappy. (-_-")

  • Apply white polish on the upper half of the nails. 
This depends on how long your nails are. The longer it is then the bigger space you'll have.


  • Then choose the colors that you want. 
It's better if you'll go for opaque colors. I decided to use my fimo clays since it's been a while since i get to use it, but feel free to use nail stickers or flower dots on the side.


  • With the thin brush, i applied the lines randomly on the tip of my nails. 
The more random it is, the better! Start with the lighter color first...


Then move on to the darker color as you work along... Make sure that you clean the brush after every color if you are using just 1 brush.


The darkest polishes should be applied last since it's harder to thoroughly remove darker polish on the bristles.


  • Top it off with glitter polish if desired.
 Just to make it fun, apply a design at the side. In my case i use the grapefruit slice fimo clay design.You can put rhinestones, stickers, dots, etc.


Well, see...
Really easy!

 Enjoy your weekend,ladies!
Jaa~
^_^

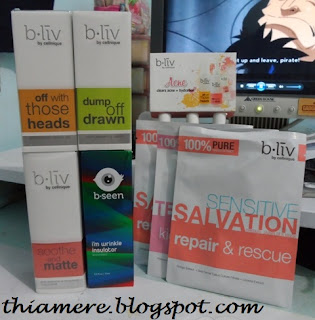
Believe in B.liv's Dump Off Drawn! I do!

I was contacted by B.liv weeks ago to try out their products. I have been so lazy in applying any skin care products lately that I can alrea...