Showing posts with label eyelook-pink. Show all posts

Sunday, August 14, 2011

Eyelook: choco strawberries

Sorry for the lack of posts... my pictures are piling up once more for things to blog so i'll start with the first one on my list... this eyelook that i did last week. I'll get to things that i have to blog one post at a time but i'll start with this for now... hehe

I'll also blog about my make-up workshop this week (i hope!) & share the things that i have learned from it. I'm just waiting for pics from the center so i can grab it too. So stay tuned,ok?

I whipped out my palettes & just decided to play with it. It was a hot & humid on that day & felt so ugly... gah!!! I hate humid climates! Well, who does,ne? hehehe

I feel like going for a girly look but since i have just done a pink eyelook the last time i thought that i'd mixed in another color for a variation at least. I thought of going for brown just to give it a depth somehow hence i came up with 'choco strawberries' for the name.. haha!

I love bright eye make-up as what you might have noticed but i really have a thing for pinks. In fact, i notice that pink is the most color that i use in my eyelook post. I ought to stop this pink madness & try others,ne? Anyway, what i like about pink is that it is very wearable whether in school or office. I used to like neutrals but now i am leaning toward pinks more, maybe it's because of my skin tone but pink just instantly brights up my eye.


Going back, i think this color combination is very versatile that it could be worn daytime or even night time depending on the shades of pinks & browns that you have. Go for lighter shades during daytime & go a bit heavy during night time. I think this is something you can actually tweak when the opportunity for a night out called for.

I'm trying to downsize the numbers of the pictures i'm posting on my blog so i just compiled the pictures in just 1. Just click the pic to enlarge it.


I've numbered the pictures so to just put a little note on each...
For those who are familiar with how i do my gradient eye make-up, you'll know how i work with blending colors. You might want to take a look at THIS & THIS for an idea of how i blend eyeshadows.

1. Pick your pinks & brown. Lighter pink shade goes to the inner eyelid, the darker pink goes to the middle & the brown goes to the outer lid. Pat the colors on the lid using an eyeshadow brush.

2. Blend the 2 pinks using a blending brush. Make them

3. Using the same brush, blend the brown with the pinks using a circular motion. You can also bring the color up halfway towards the top of the pink.

4. Line the eyes with your favorite liner. I think that brown is actually better but since i only have black so i don't have a choice, but brown will be a good choice because black is too intense.

5. Since we used a light colored eyeshadow, it would look weird if you have pinks on your waterline. You can get rid of it by tightlining & by making a dotting motion in between lashes to cover up the pink color.

6. Tightline the upper waterline to make make your lashes look fuller. Then curl your lashes & finish it with your favorite mascara!

Pardon the cadaver-looking lips on the tut pic. I used MAC Blankety there, but then i switched it to Avon Simply Pretty Love in Bloom to give my face more life.


I told you all before that i don't really care about under eye concealers because they really cake on me no matter what so just try to ignore it..haha!

First post of the week!
Stay tuned for more posts....

Have a great week, minna-san!
Jaa ne~!
^_^

ps:
Don't forget to join my giveaway, ok?
^_~
Click HERE for more info

Thursday, July 21, 2011

eyelook: pretty in pink

I said that i will post a tutorial for the eye make-up that i did in yesterday's post.
Luckily, it was sunny a while ago & i was able to take good pictures of how i did this. I try to lessen the pictures that i will be uploading in this post so i just thought of putting it in 1 to lessen the loading time. I notice that my blog loads quite slow if i put in loads of pictures...

Here is the eye make-up....


I just used 3 kinds of pink eyeshadows from my palette, but you can work with any kind of pinks that you have!
number 1- pink on the lid(you can get away with shimmery pinks if you want to!)
number 2 - hot pink on the crease (or even mauvey pink if you don't have hot pink)
number 3 - pale pink on the brow bone (or you can use your favorite highlighter)


As what i keep on saying before, blending brush is important if you want to achieve a well-blended look even if you're not after a gradient look.

You can just take a look at this for the how-to.... feel free to click to enlarge it.


This is just a simple pink eye make-up.
This could take you a little less than fifteen minutes on both eyes. The only thing that could take a bit longer would be the lash application. If you also notice i used pencil liner & not liquid, as i mostly do, because i want to soften it by smudging. It's funny how the black turns to blue upon smudging... not to complain since black could be quite intense for pink.

Try not to use pink blusher, go for a bronzer or maybe peach.
I just went light with my bronzer because the only one that i have is shimmery & i'm not really into shimmers. I have to find a matte bronzer.

Speaking of bronzer, i think you could get away with a light contouring with this kind of look especially if you're pale like me. I would not only slim your face down but it will also perk your face up!

I finished it off with a pink lipstick too. I think red would overkill this look & nude lips won't compliment the flirty-ness of the eye make-up so you might as well just go all the way with the pink on your lips as well!


Shoot!
I should have put more bronzer on or, make that, i need to go out more & catch the sun. I think i look vampire-pale already,ne?
:(


Again, you don't have to use the same things that i used. I am just listing it for reference.

FOR EYES:
FOR FACE:
  • Avon Magix Perfector - primer
  • Etude House Brow Pencil - brow
  • Palladio Rice Powder in Warm Beige - face base
  • MAC Beauty Powder in Drizzlegold - highlighter
  • Milani Glimmer Stripes in Bronzer Glimmer - bronzer
  • brushes - kabuki & blush brush
FOR LIPS:
  • MAC Lip Conditioner SPF 15
  • MAC Lipstick in Speak Louder

It's summer already so most of my students are on vacation so i have more free time blogging. I hope i can continue posting more eyelooks.


Here's to hoping that my blog bug will stay with me for a longer time!
hehehe

Have a great day,lovelies!
Jaa ne~!
^_^

Wednesday, July 20, 2011

playing with falsies~

I don't get to play with my make-up palettes as much as i want to, not because i don't have the time (that's also one..hehe) but for some reason it just doesn't look right every time i do it. There are just some time where no matter how much i blend the colors, it just doesn't look nice. I'm sure you all have had experience like mine,right?

That mostly happens to me when i do my nails.
What i am thinking of most often than not looks different when i do it on my nails already. hehe
But also in making eye make-up too once in a while..

I felt the need...yes, need!.. to whip out my palette & do a pink eye make-up last night. It's high time that the urge to do eye make-up ought to return back. I missed playing with my palette & being able to come up with something that at least looks nice. hehe

I was only able to do my right eye... hehe
I will do both of my eye later on when i do the tutorial...


Sorry about the messy hair...
My hair had dried out because i switched to an anti-dandruff shampoo.
*sigh*
Next week it will be back to its crowning glory once i go back to my Camellia Hair Care.

Anyway, i'll do a tutorial of this look maybe tomorrow. I just did this last night & i prefer taking tutorial pictures in the day so that i can photograph the process a lot better. I was testing out the falsies that KKCenterhk sent me.


They sent the ES A155 to test out as per my request.


I was surprised when i opened it because the lashes that greeted me are quite dramatic... well, dramatic for me who got small eyes.


These babies are quite unique in a way that it thickens & lengthens in the end which is perfect if you want to achieve a cat-eye look!


Since it's too long for me, i decided to cut it at the end. It's so long that it look so fake on me if i didn't cut it.

This is how it looks like on my eye after finally cutting a few strands...


I also used a lower lash because the upper lash looks so dramatic for me & it will just "close" my eye up if i didn't do so. I used the one from KKCenterhk too!

I like how this eyelash enhances my eyes every time i smile. LOL!
It's also as if my eyes are smiling too!


I can't wait to try this with both of my eyes~!


See how long this lash is?
It will perfectly fit your eye!

Tutorial post to be posted later... i'm about to do a tutorial now after this!

Have a great day,gals!
Jaa ne~!
^_^

Monday, January 31, 2011

eyelook: romantic warm pink look

The month of love is almost here & I'm sure that most of you are already planning out what your outfit or look would be for your Valentines date. Last year, I said that Red is the color of Valentines... i still think that red is still the color of Valentines, but then so is pink! So i decided to make a look using pink with a hint of warmth on it. This would be perfect for a daytime look for it will give off a fun & flirty look!


Following how i did my gradient look HERE, i just did the same steps...

This is already my 3rd make-up post. I guess my love for eye make-up is slowly returning! Yokatta na~! I thought for sure that i would be adding my eye shadows on my blogsale for i haven't felt the urge to put any eyeshadow for like almost half a year! I'll just be doing an eye make-up for i still don't want to apply face make-up since my acne is still acting up...

I used my pigments when i did this look & since they are not available anymore so i just swatched it so if you have any shadows that has the same color with these, then you can just use it as a substitute.


color 1 is a cute light pink color
color 2 is a dark pink color
color 3 is a gorgeous gold color
color 4 is a warm bronze color
Again, this is a 'for dummy version' gradient look for this is very easy to do...

Line all four shadows like so...


Blend the inner 2 colors...


Then the 2 outer colors...


Then finally you join the 2 colors by blending it more... Voila!


Make sure you bring the colors down on your lower eye area like so...using an angled brush


Apply highlighter on the brow bone area as well as the area under the brow so it won't look bare.


My friend has been asking me over & over how i apply my eyeliner. She said that she is having trouble with eyelining. It's also the same with me... but what i do to prevent uneven eyeliner is to apply eyeliner with my eyes open.


I find that compare to applying eyeliner with eyes closed, it's easier to control how thick or thin i want it to be. Anyway, your eyes are open most of the time so you have to exactly know how your liner looks like with your eyes open, not closed.


Again, when you tightline, make sure that you do an upward feathery strokes then you'll be able to cover the gaps in between your lash line so that you'll have a well-defined eye. You can also line the lower waterline if you feel like it. I actually lined my lower lash line in my pic above.

For those who have deep set eyes & wanted to darken the crease area, you can do so by using a brown color instead of the bronze. But since i look weird whenever i darken my crease area so i just opted for a bronze color. But, of course, feel free to adjust the intensity of your eye make-up, especially if it's for a night out.

There ya go!
I hope i'll be able to come up with another one in time for Valentines day.

Hope y'all have a good start for your week!
Jaa ne~!
^_^

Tuesday, November 03, 2009

eyelook:gradient pink

When i tried to change the labels of my eyelook posts i found out that i have a lot of blues...so i decided to even out the numbers by making a couple of eyelook posts starting with this pink look.
I think everybody has a soft spot for pinks,right?

I did a gradient blue already so i think it's time to do a gradient pink. I'll be using 4 colors as always. Im sorry for the blurry pics, my dog keeps on putting his paws on my legs when i was taking a pic & im ticklish so i was moving a lot. Just bear me with me.

For those who are wondering, i don't usually use the real colors when i do gradient looks. I start with a white shadow on the inner corner & a darker color outside. I won't also put a pic of the products that i used because what i want you to know is the technique so that you can do it yourself not copy what i did. But if you wanted to achieve the exact look that i did, just tell me & i'll provide the pic & swatch of what i use.

In this case i used a dark red. I think it's better to use the family color instead of the real color. In doing so, you are able to know if you are able to blend it well or not. Im leaving this simple& open to you,ladies. Feel free to change it by lining it thicker or winging it out. This is just how i do the eyeshadow. Im by no means a pro.

Let's start the tut:
  • Apply 4 colors on the lid starting with a white shadow on the inner corner & dark red shadow on the outer color.You can change numbers 2 & 3, as long as they are in the family of pinks. Again, the lighter color should be near the white & the darker ought to be near the red.
  • Blend 3 & 4 & also 1 & 2 together. It's your choice if you want to have a hint a pink on the inner corner or not. If you want to then feel free to blend everything, if not just leave it be.
  • Continue blending 1 & 2 & bring the color to the middle & start blending the 2 colors together to have a nice light pink on the middle.
  • This is how its how it should look like. Now from this point, you can darken it more by deepening the color if you have a nice crease, but since i have a small lid space i'll just keep it like this. I look freaky whenever i try to darken my outer crease.
  • Don't forget to bring the color on your lower lash line. Then highlight it & also fix your brows.
As for lining the eyes, i did not wing it out because it would elongate my eyes. I wanted to have a rounder look so i just lined the top lash & curl my lashes.

I don't have a nice white pencil so i settled for a black pencil, but then if you want a rounder eye it's preferable to tight line using white.

You can have a softer pink by just using red instead of a dark red on the outer corner. Whereas if you use a dark one it will create a magenta color like how i did mine. Actually i insist that you tweak this & personalize it so it will have your own signature.

Have fun doing your very own gradient pink. Holla at me when you tried this gradient pink,k?
Hope you all have a lovely day!

Jaa ne~!
^_^

Friday, April 24, 2009

Chyix2's Spring Make up Contest

*WARNING!*
a picture laden post!haha

Another contest entry...yipee! This time, its for Chyix2's Spring Makeup Contest

I was contemplating on what color will i focus on now... I did a rainbow look on another contest...then a green theme look on another...so now, i was thinking of something more alluring & feminine...on which i thought of using pink & purples! I guess everybody got an affinity for pinks & purples...

& i was able to do it...thanks to my trusty ol' CS Palette ^_~

& this is the look:

This is most challenging one that i've done so far...the pink & purple swatches on my arms are the proof of it....But i had fun doing this...you'll get to see later on...

I used 2 cameras on this...one is my digicam..& the other one is my old web cam...so the one that got the low resolution i used my webcam on it...since this is gonna be a picture marathon so this is better...all because it makes everything all the more easier...& since its low, it won't take too long in uploading & downloading...

Anyways, on to how i made this: (a step by step tutorial-literally!!!)

-As always..start with a clean, moisturized face...
-I have to make sure that my hair doesn't get in the way...so i put on a bandana...
-Then i'll focus on the upper part of my face first...ill do the eye makeup first...
-Start with an eye primer...this case i use UDPP - as always...hehe-I'll leave it to set, & ill focus on my brows first...
-I have an Eyebrow Duo...i took the darker shade & apply it on my brows to define it-Then time for concealing!...Nyx Concealer in Jar does the job..undereye & other blemishes..-Now comes the exciting part..the eye make up! ^_~ the star of it is the colorful palette...its obvious im excited,huh?...eye going big...lol-I numbered the palette based on what i use...So on the instruction, you'll see numbers instead of colors.....just refer to this pic so that you have an idea. I basically used 4 colors... (click it for a larger image)-Then to start it, apply number 1 on the lid area.-Then put number 2 on top of the first color.-So it should look like this:-Using a fluffy brush (i just use ELF Eyeshadow brush), take number 3 & apply it on the crease area...the area between number 1 & 2...we are doing this so to define the crease.-Maybe you are asking..why do we need to do that?...Maybe this pic will explain it better.see that?....Look at the left eye even without too much blending..it already looks good...So this look can be done with people who are still practicing the blending part...-Since i want it to be more defined...i would like to have a more defined crease...i took a small flat brush & apply number 3 on a windshield wiping motion.-Now its time to apply colors on the lower lash line. Take the angled brush then apply number 3 on the outer eye area.-Then apply number 4 on the inner area...-Number 4 is the color that i used as a highlighter.-Im almost done with my eye!
-I'll leave it at that first...I always apply ALL powders on my face first, including foundations & blush... So now ill do my face..
-Taking my Everyday Minerals foundation in Golden Medium, & my flat top brush...i apply it on my face on a circular motion.-Now its time for my cheek color! (Ellana Blush in Bliss)-So that my round face will have a shape, i apply it starting on my face...making a shape of 3. -I start it on the temple going to my cheek.-Then from my cheek going to my jaw line.-Now im done on the powders...yipee!
-Time to line my eyes...using a gel liner....but then i forgot to take a pic..sorry...gomen nasai..
I just put it on the upper part..on the outer corner...just a thin line. I just use it to define the eyes...
-To set the line that i made, i took the dark brown on my eyebrow duo & used that to set it.-This time, ill not apply mascara because im letting my lashes take a break from putting mascaras so ill just use falsies!-Then for the final touch, i lined my lower waterline using Nyx Eye pencil in Milk.-Im almost done,ladies...only the lipstick left... So i use Nyx Round Lipstick in Thalia
And there you have it! *letting my hair down* *taking a pic* then *fix it*
Im done with my spring look!Now its time for the real pic!
For those asking about my hair...yep, i have a natural wavy hair...As what my friend says, i have a 'wild' hair.I have tried everything to 'tame' it...straighten it...used hair iron..but it still goes back to its natural state...

Now,since i have a dry hair, i have to put mineral oil on it so to bring back its moisture & softness...

Wanna see how 'unruly' my hair is?There you go...haha..
i look all ready to be ironed!..

Since this is a spring look,i think its ok to put this...spring = wild..lol!

Ooopss..i forgot to include something...
Lesson Learned:
Don't be afraid to use colors even if you are not good at blending...there are some ways to achieve a good eye make up even if you are just starting..just be bold & experiment...remember, experience is the best teacher..
^_~

I really had fun doing this!
^_^

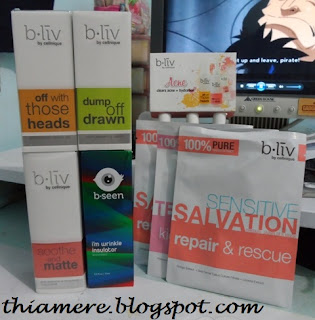
Believe in B.liv's Dump Off Drawn! I do!

I was contacted by B.liv weeks ago to try out their products. I have been so lazy in applying any skin care products lately that I can alrea...