Showing posts with label guest post. Show all posts

Sunday, April 29, 2012

Guest Post:Nivea Visage Sparkling White Acne Oil Control Whitening Cleansing Foam Review

Our second guest post came from a very dear friend, Spr Rai. I'm so happy that i was able to meet him because of my blog. We always talk about skincare & we even tried a new regimen together to see if it would deliver the said promise. hahaha. Now here is one product that he swore worked for him almost miraculously! Let's get to know what it is.
It's the Nivea Visage Sparkling White Acne Oil Control Cleansing Foam.


I really like the Sparkling White line of Nivea Visage, especially their facial foams. I probably think that this is by far my favorite among them. I have oily, acne prone skin so it really suits my skin.

Not only does it remove and control oiliness, it does other actions for fairer skin as well:

Cleans into pores to remove dirt & 90% of oil
Acne Reduction Technology helps prevent acne
Skin Nutrient Formula helps lighten dark spots & blemishes
Minimizes appearance of pores
Smoothens skin without dry feeling

NIVEA VISAGE Sparkling White Acne Oil Control contains 2x smaller molecule of:
Acne Reduction Technology that cleans deeper into pores by effectively lifting dirt and oil which is the cause of acne
Skin Nutrient Formula that helps lighten acne marks and dark spots.

Whenever I use this to wash my face, it instantly removes the excess oil. I like how my face feels squeaky clean. I don't get any irritation nor do I get breakouts from it (I experience this when I use some other brands). And it really does somehow lighten my dark spots (I have a lot of them).

I'm so happy with this product. I will certainly buy again. It's very affordable at Php125.00 for the 100g and Php75.00 the 50g. And it's available at all Watsons stores too.

You can add/drop him a message on his Facebook. Click HERE to go to his page.

Wednesday, January 04, 2012

Guest Post: One-color Smokey Eye

Let's open up the year by presenting a guest post. I have mentioned last year that i am opening my blog for guest posting & i'm really proud to give you our first make-up guest post by a very dear blogger friend Chrissy.
Hi ladies!
It’s me, Chrissy from Cosmetic Fixation. I've been away from the blogging scene for a long time, but I'm back with a vengeance. I'd like to thank sis Thiamere again for letting me do a guest post on her blog. Today, I'll be discussing how to do a one-color smokey eye.

For a girl like me, sometimes using too many makeup products isn’t very ideal. Even though I do love playing with many different colors, when I’m not in the mood or when I’m in a hurry I limit my choices of makeup just to simplify things. But when it comes to eye makeup, sometimes a one-color wash can take the dimension out of the eye. This is why I was grateful to learn the technique of applying a smokey eye with one color because it gives you that sexy, sultry look without over complicating things.

This look can be done with absolutely any color or shade under the sun, but for the purposes of this tutorial I'll be using black. Doing a one-color smokey eye is actually rather easy--let me show you how!

You will need:
  • Eyeshadow primer (optional)
  • 1 eyeshadow shade of choice
  • 1 highlight shade
  • Flat shader brush
  • Blending brush
  • Eyeliner of choice

Prime your eyelids if you wish.


With your flat shader brush, pick up black eyeshadow. To avoid fall out, tap your brush onto the back of your hand until you get rid of excess shadow.


Start patting the eyeshadow onto the eyelid. Don't worry about being messy or applying it imperfectly--it doesn't matter at this stage. Deposit enough eyeshadow so you can blend it out later on.


With your blending blush, start blending the eyeshadow upwards and outwards (shown by the arrows) in quick light strokes. keep going until you are satisfied with your blending. Stop the black shade before it reaches your brow bone!
optional: if you wish, you can stick tape on the edge of your eye to make a straight line like in the picture below.


This is what you should have so far.
At this point, take your blending brush and blend your highlighter shade on your brow bone down to the eyeshadow below. Also highlight the inner corner of your eye.


Then with a pencil brush or your flat shader brush, apply black along the outer 3rd of your lower lash line, and highlight the inner 1/3.


If you don't like the sharp line from the tape, you can blend it out with your blender brush.


Apply your eyeliner and mascara. Since I was wearing a smokey eye, I put eyeliner on my waterline and mascara on my lower lashes too. And we're done!


I finished the look with bright pink lipstick and a peachy-pink blush, but you can finish it however you like because black smokey eyes are so versatile!


Thank you for reading my tutorial on how to do smokey eyes using only one color.  Don't forget to subscribe on my site for more makeup tutorials and product reviews! You can also find me on Facebook and Twitter.

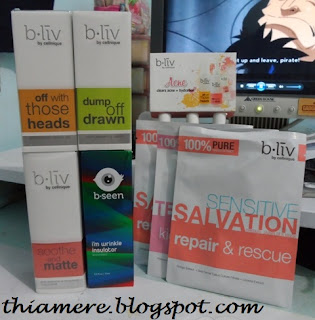
Believe in B.liv's Dump Off Drawn! I do!

I was contacted by B.liv weeks ago to try out their products. I have been so lazy in applying any skin care products lately that I can alrea...