Yep!
Another sunflower nail art!
Sunflower is my 2nd favorite flower, with tulip being the first. I can feel the heat of the summer here in the Philippines & i always relate summer to sunflower so to jump-start my summer nail tutorials, i decided to go with this design first. I already had a sunflower nails but it's not as bright & fun as i want it to be.
This would be perfect if you are longing for summer (especially for those in places where it's still cold, like New York) & would want to bring the sun right at your fingertips... or nail tips on this matter...LOL!
^_~
I think it's better if you go for an off-white/light neutral polish instead of a white polish so that the flower would stand-out. Yep, it's better if you do it on a different background especially because the flower petals are white & yellow.
I used acrylic in this nail design... white, yellow, green & black also a detailing brush as well. So let's start with the tutorial..
1. Paint random circles on your nails, this will act as the middle of the flower. I used yellow as an underbase so that it won't have a strong green, plus the combination of yellow & green is pretty nice as well.
2. Then using white acrylic, i made flower petals surrounding the circles. You don't need to worry if it's not neat or if you accidentally drew over the yellow circles. These are just under bases to make your colors stand out the more.
3. Then, using the yellow acrylics, draw random yellow streaks inside the white petals. you don't need to cover the whole petals, just the inside of it. I said streak because you just need a small yellow color to give life to the petals.
4. Then apply green acrylic on the middle of the flower. Even if you use a pthalocyanine green it won't be very dark because the yellow color would contrast it. You don't need to cover the whole yellow. actually uou can leave some yellow parts as well for added color combination.
5. For the finishing touch to give definition to our sunflower you just need to add dots of black on the surrounding of the middle. Drawing a line would make it look somehow too...uhhh..."drawn"...i can't describe it. But just trust me on this... dots is better in this case..hehe
Then wait for it to dry before you apply your top coat!
You're ready to greet your summer!
^_^
Sorry if i wasn't able to do nail art posts for quite sometime.
Actually i had already cut my nails short because i broke my ring fingernail. I know i could just repair it using nail glue & tea bag but since i have bad nail stains i figure that it would be better to just let it grow naturally at the same time it would give my nails enough time to get back to its natural state.
Anyway, hope you like this one. it's not as hard as it looks.
Do tell me if you were able to make the same design.
Have a great evening/day!
Jaa me~!
^_~
Subscribe to:
Post Comments (Atom)
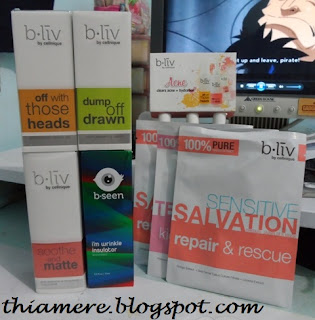
Believe in B.liv's Dump Off Drawn! I do!
I was contacted by B.liv weeks ago to try out their products. I have been so lazy in applying any skin care products lately that I can alrea...

-
I was contacted by B.liv weeks ago to try out their products. I have been so lazy in applying any skin care products lately that I can alrea...
-
For all of those who have read my "how i broke the break out cycle" post, i'm sure you know that i use Likas Papaya Soap asid...


7 comments:
Cute nails, Thia dear! So summer-y! :P
You're sooo good with nail art!! :)
Yay, a flower tutorial :D. It's so cheerful ^_^.
so cute! perfect for summer nga! inggit talaga ako sa mga mahahaba ang kuko...
Cute! ^_^ That's a very fluorescent yellow x.x
so nice!!! Bright and sunshiny! :)
Jem, so cute! :)
Uy, where do you live? Wanna hang out with me, Pammy, Crystal and Gale one of these days :) Message me!
Post a Comment