Monday, October 15, 2012

Beauty shines with big benefits in new HBC-RCBC Bankard MasterCard

Just a little heads-up for HBC lovers out there, like me!


Pinoy personal care retailer HBC, Inc. is giving its customers more reasons to shop with its new HBC-RCBC Bankard MasterCard credit card.

The HBC-RCBC Bankard MasterCard raises the stakes when it comes to cardholder benefits. It promises to deliver a whopping 10% cash rebate for purchases at HBC and HBC ShopMore upon a corresponding outstore spend of P10,000 and up. The feature is touted as the biggest rebate in the industry. Cash rebates of 0.25% are also available for retail transactions outside HBC.
Cardholders who use the credit card at HBC’s exclusive merchant partners such as Automatic Center, BLIMS Furniture, Manels, Silverworks, SOGO Home and Office Center, and Treetop Adventure in Subic will also get valuable discounts of as much as 10%. Moreover, they are entitled to pay for their HBC transactions in instalments of 3, 6, 9 and 12 months at 0% interest.

Quarterly members-only sale, free facial on their birthdays, special buys and discounts on new products, and access to special events like hairstyling and makeup seminars are also among the exclusive benefits to be enjoyed with the new HBC-RCBC Bankard MasterCard credit card.

Like the rest of RCBC Bankard credit cards, the HBC-RCBC Bankard MasterCard also gives cardholders value added service features like the SMS-based Spend Monitor, Spend Analyzer, RCBC Bankard Rewards, Dining-On-Demand, and so much more.

For more details about the new HBC-RCBC Bankard MasterCard, go to any HBC or HBC ShopMore store or visit the link http://www.rcbcbankard.com/rcbc-bankard-credit-card/hbc-rcbc-bankard-mastercard/

Monday, October 08, 2012

Franken Polish:Lilac Upbeat

Another short post..
I wanna share my latest franken polish that i decided to call as Lilac Upbeat.


A lilac jelly polish generously smothered with colorful hexagon glitters of different sizes & a light smattering of colored flitters too!

I haven't really used this yet because i don't feel like applying nail polish for now but i have been frankening polishes for the past couple of days. I mostly just do holo topcoats though.
I just feel like making bottles of holographic topcoat. Holographic topcoat can make your most hated creme polish into something really fun & funky!

Well, that's it~
^_^

Have a happy evening,ladies!
Jaa ne~!
^_~

Saturday, October 06, 2012

how to:put on fake nails~

This is a post that i have been asked about really frequently.
There are times when i just feel like having really long nails & when i do,i just put in fake nails.


Every time i ended up with very bad nail stains due to dark colored polishes i always cut my nails really short. I make sure i let my nails take a break in between because nothing irks me the most when i happen to glance at my nails (which is very often!) & they are badly stained. I just hate that yellow tinged so much that's why i just apply nail polish every weekend.

Anyways, going back to the real topic...
My nails are already growing healthy & pink that i can even do french tip mani the time when i was still doing the BFF Challenge. I decided to file it down months ago because i don't like the oval shape, i want the usual square/squoval shape.

Unfortunately i chipped the side of my pointer finger nail so i decided to just clip it all because of annoyance.


Sad,no?
Since i was still doing the challenge back then i decided to just use fake nails. I have been using fake nails every now & then. I'll show you examples of my designs on tips & the links to that post.


It's hard for me to clean the sides because they would mostly still have some remaining glue & when polish touches the glue, removing it is a real challenge so i just let it stay on & wait until the glue peels off.


I am using a different shape of tips here, still from Saizen, compare to the ones i usually use. I like the curved tips better than the straight one like in this picture.


I think they don't look like fake nails at all,no?
So, what tips do i use to achieve this natural-looking fake nails?


I love this tips from Saizen!
This one is curved & since the natural shape of my nails are a bit curved so it's perfect! They also have other tips but i mostly buy the clear ones so i get to see during application if there are air pockets or not. The other clear tips are straight, it's still ok to use but i am more comfortable with the curved ones. I have tried a lot of nail tips but i always go back to this because this fit my nails best! I almost do not need to file it anymore. Since this is from Saizen, a box of 50 tips cost P88 each.

Each set of tips have different shapes, i think the most important thing to consider is not the shape but the fit of it on your nails. You can easily alter the shape of it by filing but you can't alter the fit. It would also be the factor on how you can make the tips last on your nails. It is easy to avoid any air bubble if it has a good fit.

Now, let's get to the application part.
If you notice the box, they are divided into sections because each tips have different sizes, from 0 to 9.
You just need to choose what numbers fit each nails... like so.


This one really fits my thumb, it was just hard for me to hold it & take picture at the same time. hehe

Next is, the filing part.
File the curved edge (the one that will sit on the base of the nail) if there's a need to.


I mostly file the ones that i use for my middle fingernail. You'll see how uneven it looks like on my first picture.

Now this is the most important thing to consider before you apply the glue.
Put the tip on your nail & take note of the distance (if there is any) of your nails to the tips. You would have to make up the distance by applying a thick glob of glue.


In my case, im using a watery glue so what i do is put a drop or two on the tip & wait until it is 80% dry. It would make the bed of the tip a bit thicker so that i make up for the space in between my nail & tip.


Once it's almost dry then that's the time that i would be applying it on my nails. I would also apply glue on my nails.


Now, how i apply my tips had worked for me ever since.
I have read that some people prefer to slide it from the tip going to the base to prevent any air pockets, but since my glue is watery i can't do or else it would just accumulate on the base. What i do is i lightly put the base of the tip, waiting for the almost-dry glue to touch the glue on the nail. I don't apply any pressure at all because it will just end up forming bubbles.


Look at how the middle of tip looks whitish, it's because it still got air inside, but the side is already clear. I gently work my way towards the edge so that i would be able to avoid bubbles. By the way, the dark smudge in the pic is just a dirt on my camera, not my nail.

Keep on holding the tip so that no air would enter inside while the glue is still wet. Again, no pressure... just keep it in place to avoid it from moving.


Wait until it dries.


You can file it down if it's too long for you.

The most important thing when you apply fake nails would just be to make sure that there are no air pockets.
It would affect how long it would be able to stay on your nails & also prevent any fungal infection.

Oh, another thing, when you decide to put on fake nails, make sure that you clip your nails short because applying it with nails still long will not only make application harder but also increases the risk of breaking your real nails once the tip started breaking down. Save yourself from pain, just cut it short & you'll do fine.

Saizen tips are not durable but i like using it just because i only want them for a short time. I;m really scared sh*t of fungal infection so the longest time that i let tips stay on my nails would be for a week at most.

If you just want to have long nails instantly then nail tips would be your best bet. It's easy & fast!
If you have tried other brands of tips or glue that you love, please share it.
^_^

I know that i have not covered everything when it comes to nail tips application so if you got any questions feel free to leave a comment & i'll get back to you asap.

Have a great weekend,ladies!
Jaa ne~!
^_~

Thursday, October 04, 2012

MAC Magically Cool Liquid Powder in Truth & Light

I just want to get this out of the way so i'll make a short review...

I'm trying to make up for my lost blogging time by posting up some of the products that i had been using but just haven't made a review on. It just dawned on me that my pictures are accumulating all because i haven't been blogging as much as i want to.

Ok, first things first, this product that i bought late last year as a part of my Christmas gift for myself... haha!


I have been a fan of any face products that has a cooling sensation. I said before the time when this was first released on the Venomous Villains Collection that i will be getting it by every time i drop by MAC, it's not available. I was so happy when they decided to permanently have this one. Yay!

MAC claims that it is formulated with 70% water...
Interesting,huh?

They have 3 shades available which are Truth & Light, Honey Rose & Cajun.

Cajun is too dark for me, while Honey Rose is more of a shimmery finish rather than a blush.

Truth & Light, while it is a sheer shimmer, you could easily use it as an all-over powder as long as you don't put too much. It is really finely milled so it can easily blend on the skin without it being too shimmery unlike other highlighters. It sinks on your skin that would result in a dewy finish rather than shimmery so that's really good!


I'm sorry, hunnies, but i lost my pics of it so i'll just be linking this post over to Temptalia so that you can take a look at the swatches. Pls click HERE to be directed to it.

I used mine as a finishing powder.
Yes, i can dust it all over my face .. yay for that!

I would hesitate using this if i still have a bad skin condition but since my skin is way way better than before, so i can get away with sheer shimmery product as a setting powder. I will not recommend it if you have large pores, acne marks/scars & also fine lines. Since this will just enhance things that you wanted to hide.

It works great as a subtle highlighter if you dust it twice on the area that you want to highlight.
I prefer using my Drizzlegold in highlighting though because it has a better shimmer effect compare to this. I think Honey Rose is better suited for highlighting than this.

As for the cooling sensation, it's not that strong. I was expecting that it would provide something like a chilling sensation! hahaha!
This is more of like a breezy sensation if there is one. lol!
It still feels nice though.

Now, one thing about this is that it has a funky smell.
I guess it got something to do with it being made up of 70% water. It doesn't smell bad but it has that different smell & it gets stronger as time passes by. It's not really bad but it just smells different. i can't explain the scent though... hmmm...

That's it! haha!
Told you this would be a short review.

PROS:
  • has a cooling sensation
  • dual-purpose; can work as a highlighter or setting powder
  • its MAC so packaging is sleek & sturdy
CONS:
  • a bit expensive - $30 a pop
  • has a funky smell
Will i recommend?
Sure, especially if you are a fan of products that has cooling sensation but otherwise, you can just buy a cheaper highlighter. hehehe

This was my last MAC purchase. 
I'm not that much into cosmetics these days because my nail art addiction is currently the one that's active..haha!

Are you a fan of products that has cooling sensation?

Hope you all are enjoying your day!
Jaa ne~!
^_^


Saturday, September 29, 2012

Ebalay Nail Polish in A04

Polish Swatch time again~!

Another Ebalay polish since you all know how much i love duochromes, this time it's A04.
Love the pink color. It just looks so sweet!
^_^

This is over a black base polish.


It look s a bit like A09, the only difference is that this one have a more pronounced purple tint on it. It's almost violet than blurple (hahaha!).


Here are a couple more pictures for better appreciation.


The color change is a bit subtle but it looks pretty all the same.

     
You can get this at KKCenterhk.com or go straight to this LINK. You can use the code BLGA124TH10 for a 10% off.

Hope you all are enjoying your saturday!
Jaa ne~!
^_^


ps:
Product sent as sample. I did not receive any monetary compensation for this post. Opinion shared is personal view & is no way influenced by the company. Use at your own discretion.

Thursday, September 27, 2012

how to:DIY hot wax kits

Long time no blog!
hahaha!
i have been out of blogging because of classes & at the same time you all know that i have camera issues. I'm supposed to get it over & done with but because of little things that come up every now & then having my cam fixed had been one of my least priorities now.
*sigh*

Anyway, im always on facebook though.
I'm glad that people still read my blog even though i don't update it every now & then
Thanks for the support,hunnies!

Now, let's get back to regular programming... or blogging in this manner.
hehehe

I have received tons of questions about hair removal.
I have used several ways of hair removal, just not laser procedure though. I personally favor wax strips but i make sure that i keep creams & razors, aside from my strips & kits, for an easy & fast hair removal.

This time, i'll be focusing on hot wax kits. I'm sure you have seen wax kits on the department store every time you pass by the depilatory section. I think this had been a staple among depilatory products out there because it is really affordable & effective.

Hot wax, based on my experience, is by far the best way of hair removal. It's warm enough which makes the pores open up so you can really get to the root of the hairs easily. You don't have to go over the same skin area again & again unlike cold wax strips. But this is also the most painful way for me. hehehe

The heat makes me feel the pain a lot more because it makes the skin a bit sensitive. Some people say the heat relaxes them. I can't imagine how you could relax while pulling out body hairs!

I'll be featuring the kit from Glam Works for this post but i have tried others like Epillin & they basically works the same so no need to be a stickler when it comes to choosing brands if you decided to try DIY hot wax kits.


Me thinks the color of this wax just looks so pretty,no?
Ok, since i am featuring this green wax, you might as well know how the packaging looks like anyway...


The the description at the back says:


When you do hot wax, it's better if you have a wax strip like this, so that you won't scorch yourself trying to remove the wax off your skin.


Wax could be pretty messy & painful to remove if you don't use strips.
Warm wax would be malleable on which you won't be able to pull it off your skin easily. It will just stretch like mozzarella & will make the experience really painful & messy in the end.
Cooled wax will crack as soon as you remove it. Instead of you being able to pull it in one clean & easy sweep, you'll be forced to remove it little by little & you'll just end up pulling your skin again & again which will result to a very painful waxing experience.

Just trust me in on this.
I had experienced it.

Ok, now let's go to the procedure.
This is how i do mine. Every person has their own preference, it's just that this is how i like to heat my wax.

Most people just pop the wax in the microwave for it to melt. I haven't really tried it because we don't have microwave here. I would have to go to my parent's house just to microwave something.

A friend says that she puts it over a candle & wait for it to completely melt.
I have tried it.
I will not advise that procedure because having a direct fire contact will cause the wax to be really hot (that if you are not careful in keeping track of the temperature would end up with you burning your skin) instead of just warm & tolerable. You also risk ruining the whole batch of wax because exposing it to extreme temperature will lose its effectiveness.

So what i used to do is i try to simmer water on a pan, then i'll submerged an upside down pyrex bowl  on the pan then i put in the tin wax on top of the bowl (or bottom literally). I do not let the tin touch the bottom of the pan because it will just come in contact with the wax & again, it will just make the wax really hot & end up ruining it.

I let the water touch the bottom of my tin & the heat will just melt the wax. This is a good process for me but i find it quite tiring because i have to make sure i monitor the water & often times i turn the burner off because i can't let the water boil. If i leave the wax sitting too long it hardens a bit & i would have to turn the burner on again...

It works but it just takes a lot of work so i quit using hot wax for a time because i find it really troublesome to use.

Until i bought something that made my hot waxing experience a breeze!
Wanna know what it is?

Ta-dah!
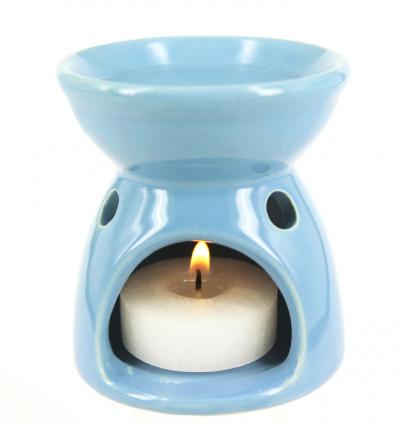
An oil diffuser!
Yep!
I use it & it makes waxing a whole lot easier than before!

I add water at the top part of it, light my tea candle, put the tin of wax on top (make sure that the water touches the tin) & just wait for it to all melt away.


If you take a closer look at my top picture, you'll still see the candle burning as i took the pic. I find using diffuser easy just because i can regulate the temperature of my wax. I can remove the candle when my wax is  hot & melted & put it back on when it's beginning to harden & get gloppy.

Just remember that you put water in there, which means that it will evaporate later on so you would have to keep on adding drops of water as soon as it's almost gone.

No need for before & after pics. It does the job.
So i think it would be pretty pointless to show the hairy & hairless pic,no?
hehehe

It removes hair...period!


See?

Now, a few tips here & there when you use hot wax.
  • If you have a low pain tolerance, some says that taking a pain reliever helps (im not sure though)
  • It's better to do it right after taking a bath so that your skin is soft
  • You can powder your skin beforehand so that the wax will just adhere to the hair & not the skin.
  • Apply the warm wax on the skin, making sure you cover the area with ample amount of wax then put the strip. Applying the wax on the strip first won't work & will just end up as a hot mess.
  • Once you apply the wax, wait for a couple of seconds before pulling. The wax needs to settle & cool a bit so that it would stick together. 
  • Rub the strip on the skin, giving it a gentle pressure as you push it downward or following the growth of the hair. This would ensure that the hair will stick to the wax.
  • When it's a bit cooler, pull it from the bottom or against the grain of the hair growth. Do it in 1 strong pull. If you hesitate it will just hurt all the more. So go ahead & give your girl muscles a work out with this!
DIY wax kits are very affordable some could be quite tedious to use (like this as i first thought) but im sure you'll be able to find a way on how to make one work for you.

Hope you all are enjoying your day!
Jaa ne~!
^_^

Wednesday, September 05, 2012

Crayon Nail Hardener

Just a short review to keep my blog going for a while..hehe

What’s your favorite nail hardener?
I always thought that nail hardeners are just pretty much the same. I have used a lot of it because I want to make sure that my nails will go strong despite it being exposed to acetone every now & then, which makes your nails brittle.

I said that I’ve tried a lot, I mean they somehow work but it’s not something that really wow-ed me. Not until I’ve tried this one hardener that wow-ed me for the price! I was able to feel result after a couple of days!

Presenting, Crayon’s Nail Hardener


Obviously, it’s a Japanese brand basing on the packaging. Hehe
I saw this at Watson’s on SM Valenzuela. I’m just not sure if this is available in all Watsons though. I don’t think so. It’s sold for Php 90 (I think). Anyway, price range of Crayon products is from Php 70 to Php 90.

If you can understand Japanese then feel free to read the description. Please tell us the translation for it too,ok? Hehehe


This one too...


I can’t understand it but one thing that I am sure of, this works!
This is the only hardener that I purchased again.
I only repurchase if I know that it really works.

It is a tiny bottle though but it really works, I swear!

What can i say more aside from the fact that it does work. It's a nail hardener, so it did harden my nails. Less chipping & peeling, if i use it together with a cuticle oil.

It tends to get thick pretty easily so make sure that you keep the cap really tight after every use..


Oh, & speaking of the cap, once you open it you'll be greeted by a stopper.


I guess this just means that the product is kept fresh until the time that you use so you don't need to worry about buying something that is already thick & goopy.


You just attach the brush on the cap itself then you're good to go!

As what i said, i haven't tried any good nail hardener for this price. I have bought 3 bottles of this already!
The only problem for this would be the availability. Unfortunately, i do not know other Watson branch that carries Crayon. If you know anything, pls free to comment for reference.

PROS:

  • cheap
  • it works
  • in a cute yet sturdy packaging
  • product is sealed shut to ensure you of good quality
CONS:
  • availability (available in selected Watsons only)
  • tiny bottle - only 8 ml
  • could get goopy once you reach halfway the bottle

Will i recommend it?
Of course!
As what i said, im on the 3rd bottle already! hahaha!

If you can find this, make sure you get it,ok?

So, what's your favorite nail hardener?

Have a great day!
jaa ne~!
^_^

Saturday, September 01, 2012

Who will be Derek's new Anna?

I'm sure you all have seen the PLDT commercial with the Anna Banana song. First time i heard it, his voice kept on playing on my head over & over.


You can watch the video if you haven't seen it yet:


Isn't this boy adorable?
Bringing the old fashioned "harana" into a whole new level!
 The second installment of the commercial is when Anna answered Derek! Ok, i know you know what she said. Take a look...


Just look at the dislikes that this video had gotten..haha!
Poor Anna! I think she will be hated for quite sometime on & off cam...lol!
Anyway, it's a good thing that Derek has a pretty supportive family. You can get over painful things when you have the people around you to lean for support, right?


Poor Derek,huh?
But then, he is still young & cute to boot!
I'm sure he'll meet more Anna or even Maria or Rachel or Suzy, etc... the list is endless! The world is not gonna end with Anna. This heartbreak will even make him stronger & a lot wiser in choosing girls. Everything is a learning experience.

Take this advice from your "ate" (older sister), everything is going to be alright. I'm sure of that!

Now for the fun part...Do you know someone who can be Derek's next Anna?
If you know a cute & charming little lady ages 12-16 then you have to let them join the hunt for Derek's new Anna! Visit http://www.dereksnewanna.com/ & submit a video entry on why they should be Derek's new Anna.
The winner will be a part of PLDT's next commercial & even take home a Samsung Ultrabook too! How cool is that?

Let's help Derek find a new Anna!

Hope you all have a great day!
Jaa ne~!
^_^

BFF Challenge: Flowers~

Wow!
I can't believe this is the last BFF Challenge. It feels like it was just last week since we started it.LOL!
Since this is the last challenge, i recreated one of my personal favorite among all the ones that i made.

If you had seen my Camellia Nail Art, you know what i'm talking about. Making it this time is a lot easier compare to the first time. It took me an hour & a half, i think compare with half a day before so i think i am already improving my painting skills,no?


Taking pictures for this was so frustrating because my camera isn't focusing (it really needs to be saved asap) & the fact that the design on my thumb is leaning on to the left area, i can't quite take full nail pictures of the whole design. tsk!


Sorry about the dust particles there.
Bf said that i can take it out by using an air spray thingy but i'm scared that it will just push the dust further to the lens.


A close-up look of the thumb. I think the thumb has the best design of them all,don't you think so?
I didn't watermark it just because i don't want to alter the resolution of it anymore since i can't take macro shots anymore.


Here's to hoping no one will steal my picture & claim it as their own. I'll be seriously pissed if someone will take credit for this when IT IS ME who shed sweat & effort trying to make this as perfect as i can.

So, what do you think?
I have a tutorial for this nail art HERE. You can just take a look at it if you want to try making this nail art too.


I am really liking this base .
It's a duochrome,actually. I'll blog about it tomorrow. It's another Ebalay polish!yay!
It is really gorgeous under the sun together with the silver design that i painted on, makes it really pop!

Another design i made earlier this week. This looks a lot better in person just because the base is a glitter polish. The glitters go all sparkly & shiny every time you move your fingers.


Well,i had fun doing the challenge.
I'm not sure if we'll start another one but for now, my main priority is to have my camera fixed. I don't want to buy another one because this camera has a sentimental value on me. I sure hope that Samsung will be able to fix this asap.

You can check out these ladies doing the same challenge with me:
Sally Of Nail Pron

Happy Saturday to y'all!
Jaa ne~!
^_^

Friday, August 31, 2012

HBC Ber Fever~!

'Ber Months is almost here, on which we Filipinos mostly associate it with Christmas time.... seriously!
Hahahaha!

So to welcome it HBC is having the 'Ber Fever!
Time to stock up on your favorite HBC Products.


‘Ber Fever offers up to 70% discount on selected HBC Beauty Exclusive products like San San, Allue, Body Recipe, Hortaleza Professional and Hortaleza, M.D.Offer The SALE runs from August 29, 2012 – September 3, 2012.

Do check out their ongoing sale!
^_^

Thursday, August 30, 2012

BFF Challenge:Cath Kidston

We're down to the 2nd to the last BFF Challenge.
This is Sally's week & i love her chosen themes! Cath Kidston & Flowers!
Cath Kidston for now...

I do not really know who or what is Cath Kidston so i did some googling & when i found out about it. I fell in love! It screams girly & you all know i love girly prints!

So, here's my version of a CK nail art~

You have to check out Cath Kidston to know what i'm talking about!
It just screams homey & cuteness!
hahaha

This is an easy nail art, except for the thumb but the polka dots & that flower bud is easy.
Again, i promise to make a tutorial for it once my camera is up for it.
Just a couple more & i'll be able to send it to the service center. I'll be without a camera for a while but i guess it's ok.hehe

A close up look of them...
The thumb~

 I love this design!
I'll make a tutorial on how i did the rose sometime.
 Then the rest of the nails~


What do you think?
Kawaii,ne?
I got lots of compliments about my nail today! I'm just grateful that no one insisted that these are stickers or else i will be slapping their faces..LOL!


You can check out these ladies doing the same challenge with me:
Sally Of Nail Pron

I'm looking forward to the last challenge because i adore flowers.
Don't you all?
hehehe

Have a happy day!
Jaa ne~!
^_^

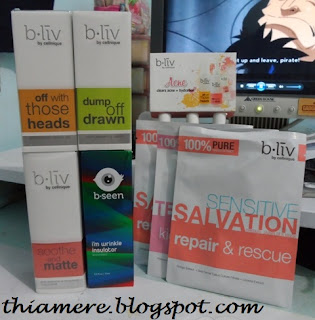
Believe in B.liv's Dump Off Drawn! I do!

I was contacted by B.liv weeks ago to try out their products. I have been so lazy in applying any skin care products lately that I can alrea...