Anyway, this is actually my first nail art for the year 2011. For some reason i am having a hard time coming up with designs. I wonder where all my ideas before flew off to? *sigh* I hope that i'll be able to make lots of nail arts this year!
Not yet weekend, but i decided to publish this post already..hehe. Hoping that this would be a nice beginning to jumpstart my blogging mood!

As always, the choice of colors would be all up to you. I just decided to try out this combination for i haven't done this yet. Actually that's yellow & maroon nail polish but i guess the maroon looks more like a brown underneath the yellow base...
Enough with the ya-da ya-da & let's let the pictures do the talking from now...
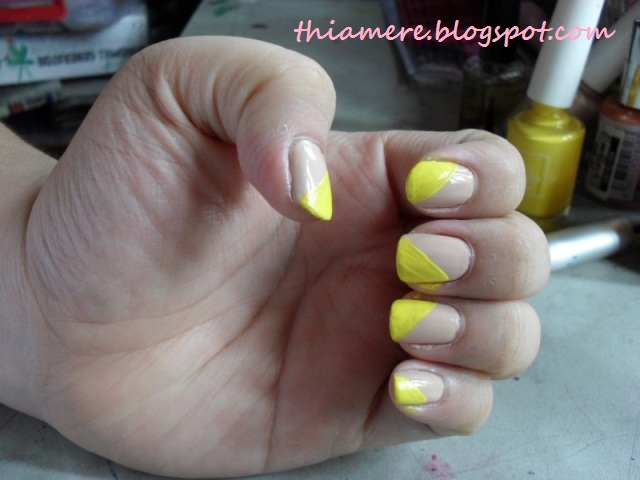
1. Apply your base coat & base polish as well.

2. Then paint half of your nails with your choice of light-colored polish as a base for the design. It's better to start with the light colors as base in everything. You'll make the colors pop more! Let it dry completely. You can choose to have all of them with 1 design, i just experimented to see if it would look ok if i will do it randomly...LOL
3. Using a detailing brush or any brush that has a fine pointed tip (i actually love using my old eyeliner brush), draw lines like this so to act as a guide on what areas you will be shading to have that checkered effect. Try to draw lines as thinly as you can.

4. Then fill the squares with the dark colored polish....

5. So that it would look like this... I actually think it already looks pretty nice,ne?

6. Using a dotting tool (or just the tip of a bobby pin), create dots at the center of each square using the contrasting color for each.

7. Finish it by drawing a line where your design meets your base polish just to polish it off. In my case, since i have these cute colored small balls (on which i don't even know how to call it!), i decided to put it to good use.

Lining them up in a straight line is pretty difficult! hahaha! Look how uneven they are!

Now, if you also have these small balls & is planning to use it on your designs, i advise that you apply top coat before putting this because if you apply top coat after this, the color would somehow "melt" away. (-__-")
Again, im not a fan of nail stuff that protrudes so i'm not even sure if i will be using it again. But it looks cute,ne?
Well then , hope you will all have a great day!
Jaa ne~!
^_^

18 comments:
This is soooo cute! Love!!
wow!!..love your mani hun..absolutely creative as usual..^_^..
love it sis! it looks like water decals.. nice color combination too! well done
! I love the small beads! I think that they're called seed beads but I could be wrong <3
pretty!
gosh!I can't imagine dealing with thos small balls...but it gave me an idea...cupcake nails tapos ganyan yung sprinkles :P hihi...very lovely tutorial sis...thank you
such a work of art sis! Those purple embellishments are simply LOVE!
Two words - super cute! Two more words - love it! :P
ang linis ng pagkakagwa mo jem.. love the small balls... ang kyut!!
This one is soooo intricately made! Nice nail art Thia! I just wonder how long before you finished both of your nails? :P
hi hun
i love your design here ^_^ naku.. ang ipahiram mu sa kin eh.. a lot of patience hehehe
visit my new blog here:
http://rhaichael.blogspot.com/
hugs
rhaindropz
Cute nails!! Love the design.
Oooo.. surprised they aren't actually that complicated to do. But I'll definitely pass on those small balls lol Like you, I don't quite like '3D' designs.
You're so creative and PATIENT! I would have given up on those small balls half way through the first nail!
cuteness
yes sis! definitely very cute, I have a couple of those balls too but I'm not that ready yet, lol I guess I'm more of a rhinestones type of protude rather than the tiny balls :)
Very pretty I like!
Wow your step-by-step application made it look so much easier to do at home! Will bookmark this page :D I followed you in google friend connect too :)
Hi,
I gave you an award! :)
http://misskatv.blogspot.com/2011/01/my-first-award.html
xoxo,
kat :3
Post a Comment