
It is also very easy to remove! Compare to nail stickers, which is a pain in the neck in removing, this one is a breeze!

These water decals that i got are already pre-cut, but there are decals that you can just cut for yourself, which are rectangular in shape.
The things that you will be needing will be:
- desired water decal
- water (of course!hehe)
- tweezers
- scissors
- orange stick
- cotton pad
- top coat (& base coat too)

So you have to cut them one by one. Actually, 1 pre-cut set like this have 12 pieces. On which you would have 2 excess design, if ever you made a mess. You'll see at the top that the edges are meant for the pinkies & the ones in the middle would be for the thumbnails.

Then drop it on the water. Let it soak up enough water so that the design would dislodge from the paper...

which will make it easy to remove by using a pair of tweezers or even just by your hand.

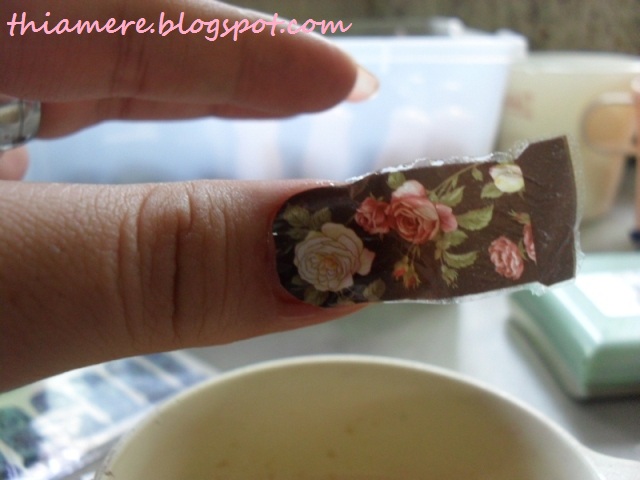
Put it on your nail.. Don't worry about it sticking to your nails once you put it, if it's wet it won't stick, so you will have plenty of time to move it around & fit it.

If it's too big for your nail, free to trim it as you see fit. I suggest that you do it before you soak it up, but it would be hard to know if it will fit your nails or not if it's still on the paper... just try to keep your hands steady when you trim it if you need to.
Using an orange stick, make sure that the edges are smooth & that it doesn't have any bubbles on it.

Dry it up by pressing the cotton pad to absorb the water, therefore making it stick to your nails. Keep on pressing, making sure that you have removed as much water as you can.

You can either trim the excess decal or just let it be. I just opted to trim it first before applying top coat.

Then you finish it off with a top coat. The water decal will react to the top coat "melting" it therefore sticking to your nails that makes it look natural. By the way, the top coat that i am using here is TFS Nail Pleasure top coat.

You can just take the excess away using an orange stick or even your fingers. It doesn't matter. If you are having a hard time cleaning the edge, you can just file it away.

Clean the edges of the nail too by taking away any excess.

Then time to admire your nails!
Most probably your next question is, does it last long?
This would depend on your top coat. So if you want it to last long, use a good top coat. Or you can just apply top coat every now & then to keep it.
This is my first water decal...

Looks pretty good after putting it.
This is how it looked like after 4 days..

This is amidst all the dish washing, laundry, scratching & any everyday wear & tear. I used 2 coats of The Face Shop's Nail Pleasure top coat (my favorite top coat!). You can see that it chipped at the edges but nothing drastic.
Again, the lasting quality of this will depend on your top coat. So, in conclusion, i have to say that the TFS Nail Pleasure Top Coat top coat is the best that i have tried so far..hehe (i thought this is a water decal post?LOL!) I would just want to add that info if ever you are on the lookout for a good yet affordable top coat. I will do a full review of it later on though.
Removing this is just a breeze!
You just use your ordinary nail polish remover. It's just as what i said... it 'melts' therefore sticking to your nails. So you remove it like any ordinary polishes.

The price is not bad considering that you can buy 1 design for Php 50 (a little more than $1). I saw some sets being sold in Ebay for a cheaper price.
You can buy it online at OneStop Kikay Shop (for local buyers), or just hop on over to Ebay (for international buyers). I bought mine at a small nail art store that is near my place.
If you haven't tried this one yet, give it a shot! Putting it on is very easy & taking it off too!
There ya go!
Hope you'll try this one!
Have a great day,hunnies!
Jaa ne~!
^_~


9 comments:
Love your water decal mani..Absolutely gorgeous..I never try water decal before because the place where I stay didn't sell water decal..I wish I can try..
I have never heard of this, and i've been waiting for your post to talk about it. I definitely want to try these. These are so cute!
omg this is so cool!! looked pretty ugly at first but the 'melting' part made it look just like normal polish o_O
I would love to try a water nail decal one of these days, thanks for the tutorial Thia dear, I really love your nails :P
its like magic! no need to put nail varnishes anymore.
I've used water decal before but I've never used one that includes the nail polish color with it, just the design you put over nail polish. Cool! =] Save a lot of hassle.
Oh, dear!!! Thanks for having a tutorial on this...I was just about to request you about making one because I'm very interested in trying it out...I so love your blog!!!
wow, thanks for this tutorial, I bought one today and I need a tutorial to use this. Thanks a lot.
n oproblem,sweetie
^_^
im sure you'll have fun with your water decal!
Post a Comment