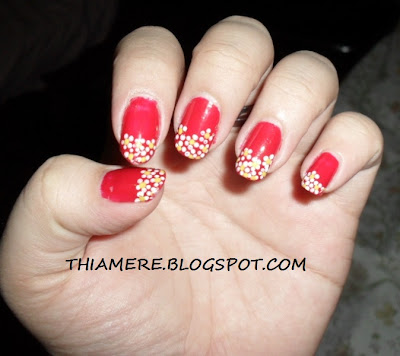
This is a pretty easy nail art. You don't think so?
Well, let's start the tutorial:
- Choose your desired base color.
- Wait for it to dry then start putting the petals of the flowers first.
Make sure that each flower has its own petals & doesn't 'share' it with other flowers for it will just destroy the over-all look. See how i encircled the petals to show each flowers that i will be making.
- Then finally add the center of the flower.
Don't forget to add a top coat!
Pretty easy,ne?
I'm not exactly a glitter fan, but you could also add glitter on your base before you start putting the flowers for it to look funkier!
I even tried it with a red base, but the yellow center just doesn't show up in the pic. But it was still fun!
Well, hope you try out this look.
It's almost friday & i can't wait for the weekend!
Jaa ne~!
^_~


17 comments:
Wow! That's really cute!
soo pretty! I'd like to try this next time!
wow.. sobrang cute sis. :) I likeee !
so pretty sissy!!
The flower tips are so pretty! Thanks for sharing :)
i really likey this design.. so cute..^_^
as always, you are sooo creative. :) I was never really a fan of nail cosmetics/art until you came along:D gonna try that asap.. thanks for the idea!
girl! i love the one with red base, your nails look really nice!!!
ang ganda thiamere! it's cute and very neat!
so pretty! :) -Dawn
these are so dainty. you really make flawless nails look easy to do.
Aww so pretty!
It looks just amazing! I have to try this design :)
love it!!!
so girly... naiingit tuloy ako, di pa ko makapag post eh, nabali isang nail ko ang i have to cut all of em short! haist...tagal humaba waaahhhhhh
Wow, you have such great craft! I envy people who can do their own nail designs. Keep it up! :)
how freakin cute! where did you get the idea for this?
Post a Comment