I said before that i use artist brush in making my nail arts.
I still get a lot of questions on my email every now & then about what brushes i use & how much they are. I prefer artist brushes i guess because i started out as a painter before i fully got into nail arts. So every time i drop by the mall i always make sure i check out an art store for some inspiration & supplies too.
Anyway, enough about my painting woes..lol!
I bought these brushes at National Bookstore. This is my current favorite detailing brush.
How much is this?
Feast your eyes! Ay mali, wallet pala! (wrong,i mean your wallet) hahaha
I have been using this for a couple of months now. I bought a couple of them & every time i go to National Bookstore it always finds a way on my basket.
It has different sizes, make sure you get #1.
This is how it looks like.
It looks a bit stiff because this is a new one but you see how it has a nice tip for making really tiny details on a small canvas.
See?
I have 5 of them!
I think i'll stop buying them na. I've had enough to last me a lifetime. hahaha!
This will last a long time compare to other brushes just because this doesn't have a metal ferrule.
So, if you are hesitant in spending money for a set brush or you are just starting & would want to practice more, then this is perfect,ne?
Make sure you get this one & start practicing on your nail art!
Have a great day,ladies!
Jaa ne~!
^_~
Showing posts with label brushes. Show all posts
Tuesday, May 08, 2012
Saturday, February 04, 2012
how to:nail art brushes part 2
If you missed my first post about how to use the nail art brush set, you can take a look HERE.
So, continuing with what i have left...
THE FLAT BRUSH
What i like about this brush is that it's very easy to apply polish/acrylic. Unlike brushes that is included in the bottle, flat brushes can make polish application a breeze. You have to try this in pigmented creme polishes, you can achieve a full coat with just a swipe or two with this. You can do flower petals too! Just lightly drag the tip on the surface.
As to flat brushes, you can also do one strokes with it. I'm not an expert when it comes to one stroke method yet. I have tried once though but not this brush. hehehe
One thing that i like about this is that it's great for removing/cleaning excess polish! Since it is flat, it can easily go to the crevices of your nails to remove any lingering polishes! Just dip the bristles on your polish remover then go around the sides of your nails to clean it up.
THE ANGLED BRUSH
You can do flower petals with this brush like the filbert brush but I prefer using it for one strokes though. I think that this is easier to work with for one strokes rather than flat brushes.
You can take a look at Tartofraises' video for a how-to for this design HERE.
This is also a great tutorial from her!
THE DOTTING TOOL
Now, this is one of my favorite!
This is one of the easiest but versatile nail art tool that you can use. Depending on the tip of it, you can make large to tiny dots. I have used dotting tools countless of times on my nail art tutorial & i have to say that it's so versatile, it's not just simply for making dots! You can do all these designs using this.
Here are a couple of nail designs that i made using a dotting tool. This is a very easy design to do, i promise!~
This is one of my favorite dot designs.
Another favorite of mine! I adore contrasting colors!
Making heart designs are a lot easier with dotting tools rather than brushes, believe me!
Now, the next time you see a dotting tool, don't just think of dots designs,ne? There ya go. Hope you find this post somewhat helpful! If you want to get the same set of brushes that i have you can order it HERE. You can use the code at the left sidebar of my blog for an additional 10% of your purchase. Again, if you haven't checked my first post about nail art brushes, then go HERE. Have a great weekend everybody! Jaa ne~! ^_^
ps: Product sent as sample. I did not receive any monetary compensation for this post. Opinion shared is personal view & is no way influenced by the company.
Tuesday, January 17, 2012
brush guard dupe!!!!
We know that brushes are an investment. You can't have great works if you have crappy tools,right? You have to take care of your brushes just like how you take care of your make-up. How do you do that? Simple, buy a brush guard... or so the pros keep on saying.
I was browsing through Ebay one time looking for brush guards because i am getting irritated with the splayed bristles on my brushes. I placed a bid on an authentic variety pack brush guard when i saw a 1 meter cosmetic brush guard mesh for only $1. I immediately bought 3. I mean 1 meter for just a dollar... how cheap is that?!
Since it's cheap to start with i bought 3 & i think that it's a nice purchase.
Now, i'll just clear this from the start that i have the authentic brush guards in variety pack. So this would be a comparative review. A bit like a splurge or save post too..hehe
What i like about the variety pack is that it covers small to big brushes. I'm sure you have reviews about it already so i'll not bore you into details about it since this post is about the dupe.
In this picture you'll see the real brush guards compare to the 1 meter brush guard mesh protector that i am telling you.
See how different it looks from each other?
I'll give you my idea of how it works like but i'm not sure if i got it right,ok? This is just my opinion.
The real Brush Guard has several strands of nylon lined up perfectly then woven intricately. The ends were melted together to stop it from splaying & running out. The thickness of the nylon i guess helps it to "absorb" the water from the bristles then slides down to the tube for faster drying. That's most probably the logic behind it.
The brush guard has a specific size for different brushes. It doesn't mold to the shape of the brushes but retains its tubular shape when you use it... except of course when the brush has thick bristles.
Now on to the mesh protector...
Well, what do you expect...?
It's a mesh. It reminds me of fruits that are in a styro mesh to keep it protected.
It's a thin plastic mesh that molds to the shape of your brush to help retain its shape. Since this is made of plastic i don't think that it can easily absorb water from the bristles for faster drying but then this is thin enough to let the air pass by compare to the brush guard so i guess that it would somehow compensate for the material.
The ends of the brush guard are melted together, as what i said before, now the mesh protector doesn't need any melting at all because it has this hexagonal mesh that connects each other so you can just cut it freely without worrying over splayed fibers unlike the brush guard.
This is what i was saying about the shape. The mesh protector molds to the shape of your brush while the brush guard retains its tubular shape.
I'll let you know too that i don't actually like using brush guards when drying my brushes.
Why? It takes a long time for it to dry. I prefer to just air-dry as is then i put the brush guard later. I hate it when my brushes has this weird scent because it took too long to dry. I know you know what i'm talking about so don't go telling me that maybe i didn't rinse my brushes really well because i do!
This most especially happens on kabukis because they have thick bristles. The middle part of the bristle begins to smell weird if you let the bristles dry clumped together. Actually whenever i air dry my brushes i see to it that i fluff the bristles out by spreading them around to let the air circulate on it to make sure that any moisture left on the base of the bristles would totally evaporate.
Anyway, this is just my opinion.
I prefer to use the brush guard for storage not for drying them out. So if you'll ask me if it functions like the brush guard when drying i can;t answer you because i haven't tried it & i won't try it because i really hate smelly brushes!
This is how it looks like when put on a brush.
It keeps the bristles all where they are supposed to be. As long as it does the function of keeping my brushes in shape i don't care whether it's the original or not.
Now one thing that i find maybe a bit disconcerting is the length of them.
Since the brush guard's length is already fixed per brush, on which it will definitely cover the ferrule & a big allowance at the end. I thought that it is somehow a waste that 1 guard is about 2/3 the size of the whole brush itself on which you only need it for the bristles,ne?
See this pic?
The frugal in me thought of cutting it in half so i could maximize my money's worth. haha!
But i think that it will just look ugly if i do that. Again, the brush guard's shape is like a tube. I think part of its functionality is it's length too. That means i can't go on splitting it in two. I might just regret it.
Now, as for the mesh protector, i can maximize it without any problems at all.
Why? It's because it molds to the shape of the brush. It can retain the shape of the brush from the ferrule up to the end so it will not matter if you cut it really short. The shorter you cut it the more protector you have for your brush since you are the one deciding how long/short you want it to be.
The only thing is the appearance. If you cut it short it would look weird. I mean how funny your brushes would look if you have something that covers it only up to the ferrule? it would be like seeing a man wearing a high-waist beach short! haha!
But since these are just my personal brushes i don't care if they look like so as long as the shape is ok then im fine with high-waist short. LOL!
Now my main issue about this is that it will be hard to use this for tiny eye make-up brushes like angled brush for one. The mesh protector could accommodate big brushes because it could stretch wide but it couldn't really mold into small brushes,wouldn't it? You can still use it though, it just wouldn't really snugly fit those small ones.
I bought this at Ebay HERE for just a little more than a dollar ($1.04 to be exact) with free worldwide shipping. See?! That is already amazing by itself,ne? $1 + free shipping!
PROS:
With all of those said, what's my verdict?
Did i like it?
Yeah, it works great in keeping my brushes in tip top shape. It's also cheap & i get my money's worth, actually double my money's worth because if i'll compare it with the brush guards it can have 10 or more mesh protector with just a fraction of a price. The brush guards retail for more or less than $5 with just 6 pieces or so.
Will i recommend it?
Sure!
Again, i haven't tried it in drying my brushes because of the said reason but if you are looking for an affordable way to keep your brushes in shape then go ahead & get this. Your dollar is well-spent.
I won't mind buying again but since i have 3 of them i think i have enough to keep my brushes in shape for the time being.
Have you tried brush guards?
Will you still try this one then if you have the real brush guards?
Hope you all have a great day!
Jaa ne~!
^_^
ps:
i'm not connected to the seller. i just thought of making a post about this because it works ok & it will save you money. ^_~
I was browsing through Ebay one time looking for brush guards because i am getting irritated with the splayed bristles on my brushes. I placed a bid on an authentic variety pack brush guard when i saw a 1 meter cosmetic brush guard mesh for only $1. I immediately bought 3. I mean 1 meter for just a dollar... how cheap is that?!
Since it's cheap to start with i bought 3 & i think that it's a nice purchase.
Now, i'll just clear this from the start that i have the authentic brush guards in variety pack. So this would be a comparative review. A bit like a splurge or save post too..hehe
What i like about the variety pack is that it covers small to big brushes. I'm sure you have reviews about it already so i'll not bore you into details about it since this post is about the dupe.
In this picture you'll see the real brush guards compare to the 1 meter brush guard mesh protector that i am telling you.
See how different it looks from each other?
I'll give you my idea of how it works like but i'm not sure if i got it right,ok? This is just my opinion.
The real Brush Guard has several strands of nylon lined up perfectly then woven intricately. The ends were melted together to stop it from splaying & running out. The thickness of the nylon i guess helps it to "absorb" the water from the bristles then slides down to the tube for faster drying. That's most probably the logic behind it.
The brush guard has a specific size for different brushes. It doesn't mold to the shape of the brushes but retains its tubular shape when you use it... except of course when the brush has thick bristles.
Now on to the mesh protector...
Well, what do you expect...?
It's a mesh. It reminds me of fruits that are in a styro mesh to keep it protected.
It's a thin plastic mesh that molds to the shape of your brush to help retain its shape. Since this is made of plastic i don't think that it can easily absorb water from the bristles for faster drying but then this is thin enough to let the air pass by compare to the brush guard so i guess that it would somehow compensate for the material.
The ends of the brush guard are melted together, as what i said before, now the mesh protector doesn't need any melting at all because it has this hexagonal mesh that connects each other so you can just cut it freely without worrying over splayed fibers unlike the brush guard.
This is what i was saying about the shape. The mesh protector molds to the shape of your brush while the brush guard retains its tubular shape.
I'll let you know too that i don't actually like using brush guards when drying my brushes.
Why? It takes a long time for it to dry. I prefer to just air-dry as is then i put the brush guard later. I hate it when my brushes has this weird scent because it took too long to dry. I know you know what i'm talking about so don't go telling me that maybe i didn't rinse my brushes really well because i do!
This most especially happens on kabukis because they have thick bristles. The middle part of the bristle begins to smell weird if you let the bristles dry clumped together. Actually whenever i air dry my brushes i see to it that i fluff the bristles out by spreading them around to let the air circulate on it to make sure that any moisture left on the base of the bristles would totally evaporate.
Anyway, this is just my opinion.
I prefer to use the brush guard for storage not for drying them out. So if you'll ask me if it functions like the brush guard when drying i can;t answer you because i haven't tried it & i won't try it because i really hate smelly brushes!
This is how it looks like when put on a brush.
It keeps the bristles all where they are supposed to be. As long as it does the function of keeping my brushes in shape i don't care whether it's the original or not.
Now one thing that i find maybe a bit disconcerting is the length of them.
Since the brush guard's length is already fixed per brush, on which it will definitely cover the ferrule & a big allowance at the end. I thought that it is somehow a waste that 1 guard is about 2/3 the size of the whole brush itself on which you only need it for the bristles,ne?
See this pic?
The frugal in me thought of cutting it in half so i could maximize my money's worth. haha!
But i think that it will just look ugly if i do that. Again, the brush guard's shape is like a tube. I think part of its functionality is it's length too. That means i can't go on splitting it in two. I might just regret it.
Now, as for the mesh protector, i can maximize it without any problems at all.
Why? It's because it molds to the shape of the brush. It can retain the shape of the brush from the ferrule up to the end so it will not matter if you cut it really short. The shorter you cut it the more protector you have for your brush since you are the one deciding how long/short you want it to be.
The only thing is the appearance. If you cut it short it would look weird. I mean how funny your brushes would look if you have something that covers it only up to the ferrule? it would be like seeing a man wearing a high-waist beach short! haha!
But since these are just my personal brushes i don't care if they look like so as long as the shape is ok then im fine with high-waist short. LOL!
Now my main issue about this is that it will be hard to use this for tiny eye make-up brushes like angled brush for one. The mesh protector could accommodate big brushes because it could stretch wide but it couldn't really mold into small brushes,wouldn't it? You can still use it though, it just wouldn't really snugly fit those small ones.
I bought this at Ebay HERE for just a little more than a dollar ($1.04 to be exact) with free worldwide shipping. See?! That is already amazing by itself,ne? $1 + free shipping!
PROS:
- works great
- really cheap!
- 1 meter can cover a lot of brushes!
- free worldwide shipping!
- no need to worry of the ends running/splaying unlike the brush guard
CONS:
- not locally available (but hey, they offer free shipping!)
- would not really give a snug fit to small brushes, but it would still work though
Did i like it?
Yeah, it works great in keeping my brushes in tip top shape. It's also cheap & i get my money's worth, actually double my money's worth because if i'll compare it with the brush guards it can have 10 or more mesh protector with just a fraction of a price. The brush guards retail for more or less than $5 with just 6 pieces or so.
Will i recommend it?
Sure!
Again, i haven't tried it in drying my brushes because of the said reason but if you are looking for an affordable way to keep your brushes in shape then go ahead & get this. Your dollar is well-spent.
I won't mind buying again but since i have 3 of them i think i have enough to keep my brushes in shape for the time being.
Have you tried brush guards?
Will you still try this one then if you have the real brush guards?
Hope you all have a great day!
Jaa ne~!
^_^
ps:
i'm not connected to the seller. i just thought of making a post about this because it works ok & it will save you money. ^_~
Tuesday, December 13, 2011
what have i been doing?
I haven't been that active in blogging lately & let me tell you that i am really feeling guilty. I am just so thankful that you have still been checking my blog even if i don't update regularly. I'll make it up to you by letting you know about things that have been going on with me for the past couple of weeks.
I don't even know where to start...?
Uhhhhmmm... i guess i'll start with the recent update.
I haven't really done a lot of nail art post lately because i have been so busy & my nails are like the last thing that on my mind. But luckily, last weekend i was able to do a nail art (finally!) & here is my current mani.
I'll make a tutorial on this design within this week. And no, this is not a decal, i did this freehand so i'm sure you can also do this. I'll take single tutorial pictures right after this post. hehe
Then some things/thoughts that i want to share....
I have bought this finishing powder & let me tell you that i love love love this finishing powder!
I'll make a separate post about this but i love how this photographs really really well!
I'm sure you know what side has make-up on,right?
I decided to just do half of my face because i want to really see the difference. Oh, i use San San's Matte Liquid foundation underneath & i am liking it too! It almost looks natural on me,right?
This is how it looks on broad daylight.
I know that the color of my face looks different with my neck because my neck is actually darker but since this is just a test, i didn't bother applying it on my neck. i also didn't apply any concealer & i'm glad that this combo was able to hide my small imperfections quite nicely.
^_^
In depth review after a couple more weeks.
Then i finally succumb to the call of the brush guard...
I have been really curious about this one but let me tell you that i don't think that it really a must for me. It just makes drying of brushes really long! I guess that this is better for storage but not really for drying. Anyway, that's just my opinion.
Then last week, i was really surprised when the mailman dropped by in the evening to make a delivery!
It came from my very revered "ate"!
I wasn't really expecting anything & i was really shocked when the mailman dropped a big box on my arms. I haven't really got any packages from Japan yet but now i know that it would be delivered straight to my house so another door has opened for me.
Napajapan, i'm gonna be your future customer! hahaha
Anyway, i was so surprised with everything that i got!
Everything is an eye candy!
*looks straight at Kamenashi Kazuya*
OMG!
I can't believe that they are mine!
Oh, of course i shared it with my brothers but seeing everything is just so unbelievable!
I have been singing "Run for you" ever since i got this!
Since i am already talking about this, i'll go over the Nail Up! magazine.
I only have soft copies of japanese nail art magazines from nail up, nail max & nail venus so owning one is definitely exhilarating!
Here are a couple of sample shots...
Will you all just look at the details of this nail design?
She even included the top coat that i have been searching for ever since!
Arigatou, onee-sama!
It's not a mistake that i choose '-sama' as the honorific to call you because i really look up to you.
Thank you, thank you, thank you!
*hugs*
Since we are already on the topic of nails, i'll just tell you all that i won 7th place on our group's nail art contest. Yay! So happy!!!!
(pictures taken from my facebook account)
I also attended our anniversary party where the awarding happened. It was a very memorable day!
I love my FUN group!
Did you know that you can do very detailed nail art design using a nail art fountain pen?
I tried it & it was so easy to use! I made the rose design at left part.
Another thing that was added on my things-i-wanna-own.
My list is endless!!!
hahaha!
Last thing that i wanna share, i have been looking for a good pair of flats that would fit my big feet & i'm really glad that i was able to find one that fits my feet snugly & comfortably.
Presenting my KIMI flats!
I bought mine at the Noel Bazaar for only Php 580 (i think?) for 2 pairs! How awesome is that?!
I'm just bummed out that Kimi is not available everywhere.
*sigh*
Do you know where Kimi is available?
I would love to own a few more pairs.
Well, i think this post is already too long. hahaha!
Just to let you know that i am still alive & i always read your comments.
Thanks for the blog support, sweeties!
Make sure you join my Week 6 giveaway,ok?
Hope you all are having a great day!
Jaa ne~!
^_^
I don't even know where to start...?
Uhhhhmmm... i guess i'll start with the recent update.
I haven't really done a lot of nail art post lately because i have been so busy & my nails are like the last thing that on my mind. But luckily, last weekend i was able to do a nail art (finally!) & here is my current mani.
I'll make a tutorial on this design within this week. And no, this is not a decal, i did this freehand so i'm sure you can also do this. I'll take single tutorial pictures right after this post. hehe
Then some things/thoughts that i want to share....
I have bought this finishing powder & let me tell you that i love love love this finishing powder!
I'll make a separate post about this but i love how this photographs really really well!
I'm sure you know what side has make-up on,right?
I decided to just do half of my face because i want to really see the difference. Oh, i use San San's Matte Liquid foundation underneath & i am liking it too! It almost looks natural on me,right?
This is how it looks on broad daylight.
I know that the color of my face looks different with my neck because my neck is actually darker but since this is just a test, i didn't bother applying it on my neck. i also didn't apply any concealer & i'm glad that this combo was able to hide my small imperfections quite nicely.
^_^
In depth review after a couple more weeks.
Then i finally succumb to the call of the brush guard...
I have been really curious about this one but let me tell you that i don't think that it really a must for me. It just makes drying of brushes really long! I guess that this is better for storage but not really for drying. Anyway, that's just my opinion.
Then last week, i was really surprised when the mailman dropped by in the evening to make a delivery!
It came from my very revered "ate"!
I wasn't really expecting anything & i was really shocked when the mailman dropped a big box on my arms. I haven't really got any packages from Japan yet but now i know that it would be delivered straight to my house so another door has opened for me.
Napajapan, i'm gonna be your future customer! hahaha
Anyway, i was so surprised with everything that i got!
Everything is an eye candy!
*looks straight at Kamenashi Kazuya*
OMG!
I can't believe that they are mine!
Oh, of course i shared it with my brothers but seeing everything is just so unbelievable!
I have been singing "Run for you" ever since i got this!
Since i am already talking about this, i'll go over the Nail Up! magazine.
I only have soft copies of japanese nail art magazines from nail up, nail max & nail venus so owning one is definitely exhilarating!
Here are a couple of sample shots...
Will you all just look at the details of this nail design?
She even included the top coat that i have been searching for ever since!
Arigatou, onee-sama!
It's not a mistake that i choose '-sama' as the honorific to call you because i really look up to you.
Thank you, thank you, thank you!
*hugs*
Since we are already on the topic of nails, i'll just tell you all that i won 7th place on our group's nail art contest. Yay! So happy!!!!
(pictures taken from my facebook account)
I also attended our anniversary party where the awarding happened. It was a very memorable day!
I love my FUN group!
Did you know that you can do very detailed nail art design using a nail art fountain pen?
I tried it & it was so easy to use! I made the rose design at left part.
Another thing that was added on my things-i-wanna-own.
My list is endless!!!
hahaha!
Last thing that i wanna share, i have been looking for a good pair of flats that would fit my big feet & i'm really glad that i was able to find one that fits my feet snugly & comfortably.
Presenting my KIMI flats!
I bought mine at the Noel Bazaar for only Php 580 (i think?) for 2 pairs! How awesome is that?!
I'm just bummed out that Kimi is not available everywhere.
*sigh*
Do you know where Kimi is available?
I would love to own a few more pairs.
Well, i think this post is already too long. hahaha!
Just to let you know that i am still alive & i always read your comments.
Thanks for the blog support, sweeties!
Make sure you join my Week 6 giveaway,ok?
Hope you all are having a great day!
Jaa ne~!
^_^
Friday, October 14, 2011
how-to:nail art brushes + acrylic painting Part 1
Sorry for not being able to blog regularly. I think i have been apologizing over & over again because of my lack of updates. I hope that you'll be able to forgive me with this post. My long overdue post about nail art brushes.
This 15 pc. brush set is from BornPretty.
It has a pretty good selection of brushes in making different designs. It got detailing, liner, fan, angled, filbert & dotting tools. According to the website it has:
3 drawing tools
7 painting tools
2 liners
1 dotting tool
2 fan brushes for nail art effect
I seriously can't understand why there is a need for 2 fan brushes though. i'd rather have another filbert brush to go with this set.
I prefer acrylic as my medium all because it's easy to work with. You can easily wipe it out when you made an error (provided that it's still wet). Unlike polishes where you have to redo everything once more. I have received tons of questions if it's ok to use the acrylic sets that painters use.
I, myself, use acrylic sets like that. I think as long as you put on base coat, it won't harm your nails. I have even tried using it as my base color & nothing happened on my nails.
note:
Make sure that you do not get the acrylics on the ferrule or you'll risk the bristles of your brush splaying out. Getting the debris out of ferrule is not an easy task. You'll end up ruining your brush when it splayed out, especially for detailing brushes! Just dip the bristles half-way on the acrylic & make sure you clean it after every use.
Let's start by prepping up first & what you need before you start playing with colors.
First of all, you have to remember that acrylic dries fast. It is water-based so you would need to spritz water on it every now & them to keep it easy to work with. So you would need an atomizer filled with water (mine is really small...see that small orange bottle?) to keep it pliable.
Then of course, something that you can use as a pallet. I just use old CDs. Something to wipe your brushes with... kitchen towel or tissue & of course your jar of water to clean your brushes.
Now that we got that out of the way let's go to the brushes...
My favorite brush of all...
This is the most versatile brush of all because you can make specific designs with this.
Detailing brush has fine tip so that you'll be able to maneuver it easily. I mostly use this on my nail art tutorials. Here are some of the designs that i did using this brush. Just click the title of each picture to see the step by step tutorial on how to make that design.
You just need to have steady hands when doing detailed work, well, since acrylic can be easily removed with wet wipes, you can practice the design as much as you want on the surface without worrying about it.
You can do lines easily with this brush too...
even dots!
You can also use your polish as your medium, just make sure that you will not get the polish into the ferrule... same goes with acrylics.
If there is one brush that i would recommend that you buy, it would be this. You can also use artist brushes. In fact, my favorite detailing brushes are craft brushes. Sizes would vary of course, just go for the smallest ones, which i think is 3/0, if my memory serves me right.
You can do a lot of designs with detailing brushes!
Love love love detailing brushes!
This is a very nice brush to make flowers with.
Please refer to this illustration on how to make flower petals.
You just need to lay it on the surface then drag it either towards you or going out.
See the 2 different flowers using this brush?
Cute,huh?
^_~
This is one design that i made using a filbert brush.
Striping brush have flat ferrule as opposed to detailing brushes that has a round ferrule.
So, what designs can you make with it?
Basically, you use it to make stripes!
Of course, it doesn't mean you only need to use it for straight lines. You can make waves with this brush too, like this.
This is perfect for making those background waves.
I didn't really do this design for i had it made on the salon, but the brush that was used on this is striping brush.
Fan brush can be used to clean the surface among other things.
The top pictures would be to show to make random "flowing" stripes in just a couple of strokes & the 2nd one is how to use it in picking up glitters/pigments. You tap it straight on to your wet polish for that added bling!
I didn't use a fan brush in this nail art but i should have just used it because the end result would just be basically the same.
The grasses on the ring finger is made with a fan brush.
These are just the basic use for the brushes but you don't need to limit yourself to these designs with each brushes. Heck, you can even do flower petals with a striping brush! Just explore these brushes to figure out the different uses.
To be able to see my nails art easily you can click on my FB NAIL ART ALBUM. It would be easy for you to browse through my past designs with blog links on each pictures for reference.
I'll continue with another post to talk about the other brushes like the flat & angled brushes. I actually cut my nails a few days ago so they're really really short now but i don't mind. I am enjoying my shampooing experience because i can get to massage my scalp as much as i can unlike before. LOL!
I just hope that it will grow long by christmas time because i would like to don christmas design on my nails this holiday!
It's going to be my birthday this Sunday. I can't believe how fast time flies.. I'm already 27!
Wow! Where did all the years went? haha!
Anyway, hope that you'll have a happy weekend!
Jaa ne~!
^_^
ps:
Product presented as samples. I did not receive any monetary compensations. Opinions posted are mine alone & not influenced by the company.
This 15 pc. brush set is from BornPretty.
It has a pretty good selection of brushes in making different designs. It got detailing, liner, fan, angled, filbert & dotting tools. According to the website it has:
3 drawing tools
7 painting tools
2 liners
1 dotting tool
2 fan brushes for nail art effect
I seriously can't understand why there is a need for 2 fan brushes though. i'd rather have another filbert brush to go with this set.
I prefer acrylic as my medium all because it's easy to work with. You can easily wipe it out when you made an error (provided that it's still wet). Unlike polishes where you have to redo everything once more. I have received tons of questions if it's ok to use the acrylic sets that painters use.
I, myself, use acrylic sets like that. I think as long as you put on base coat, it won't harm your nails. I have even tried using it as my base color & nothing happened on my nails.
note:
Make sure that you do not get the acrylics on the ferrule or you'll risk the bristles of your brush splaying out. Getting the debris out of ferrule is not an easy task. You'll end up ruining your brush when it splayed out, especially for detailing brushes! Just dip the bristles half-way on the acrylic & make sure you clean it after every use.
Let's start by prepping up first & what you need before you start playing with colors.
First of all, you have to remember that acrylic dries fast. It is water-based so you would need to spritz water on it every now & them to keep it easy to work with. So you would need an atomizer filled with water (mine is really small...see that small orange bottle?) to keep it pliable.
Then of course, something that you can use as a pallet. I just use old CDs. Something to wipe your brushes with... kitchen towel or tissue & of course your jar of water to clean your brushes.
Now that we got that out of the way let's go to the brushes...
My favorite brush of all...
THE DETAILING BRUSH
This is the most versatile brush of all because you can make specific designs with this.
Detailing brush has fine tip so that you'll be able to maneuver it easily. I mostly use this on my nail art tutorials. Here are some of the designs that i did using this brush. Just click the title of each picture to see the step by step tutorial on how to make that design.
You just need to have steady hands when doing detailed work, well, since acrylic can be easily removed with wet wipes, you can practice the design as much as you want on the surface without worrying about it.
You can do lines easily with this brush too...
even dots!
You can also use your polish as your medium, just make sure that you will not get the polish into the ferrule... same goes with acrylics.
If there is one brush that i would recommend that you buy, it would be this. You can also use artist brushes. In fact, my favorite detailing brushes are craft brushes. Sizes would vary of course, just go for the smallest ones, which i think is 3/0, if my memory serves me right.
You can do a lot of designs with detailing brushes!
Love love love detailing brushes!
THE FILBERT BRUSH
This is a very nice brush to make flowers with.
Please refer to this illustration on how to make flower petals.
You just need to lay it on the surface then drag it either towards you or going out.
See the 2 different flowers using this brush?
Cute,huh?
^_~
This is one design that i made using a filbert brush.
THE STRIPING BRUSH
Striping brush have flat ferrule as opposed to detailing brushes that has a round ferrule.
So, what designs can you make with it?
Basically, you use it to make stripes!
Of course, it doesn't mean you only need to use it for straight lines. You can make waves with this brush too, like this.
This is perfect for making those background waves.
I didn't really do this design for i had it made on the salon, but the brush that was used on this is striping brush.
THE FAN BRUSH
Fan brush can be used to clean the surface among other things.
The top pictures would be to show to make random "flowing" stripes in just a couple of strokes & the 2nd one is how to use it in picking up glitters/pigments. You tap it straight on to your wet polish for that added bling!
I didn't use a fan brush in this nail art but i should have just used it because the end result would just be basically the same.
The grasses on the ring finger is made with a fan brush.
These are just the basic use for the brushes but you don't need to limit yourself to these designs with each brushes. Heck, you can even do flower petals with a striping brush! Just explore these brushes to figure out the different uses.
To be able to see my nails art easily you can click on my FB NAIL ART ALBUM. It would be easy for you to browse through my past designs with blog links on each pictures for reference.
I'll continue with another post to talk about the other brushes like the flat & angled brushes. I actually cut my nails a few days ago so they're really really short now but i don't mind. I am enjoying my shampooing experience because i can get to massage my scalp as much as i can unlike before. LOL!
I just hope that it will grow long by christmas time because i would like to don christmas design on my nails this holiday!
It's going to be my birthday this Sunday. I can't believe how fast time flies.. I'm already 27!
Wow! Where did all the years went? haha!
Anyway, hope that you'll have a happy weekend!
Jaa ne~!
^_^
ps:
Product presented as samples. I did not receive any monetary compensations. Opinions posted are mine alone & not influenced by the company.
Subscribe to:
Posts (Atom)
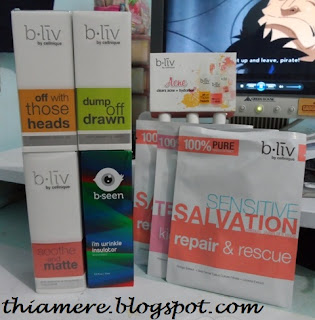
Believe in B.liv's Dump Off Drawn! I do!
I was contacted by B.liv weeks ago to try out their products. I have been so lazy in applying any skin care products lately that I can alrea...
-
I said before that i have a bad case of acne...& i am running out of options already. In comes Kojie-san Skin Lightening Soap made from ...
-
That's all thanks to Diamond's Orange Peel & L-Glutathione Soap ! It's THE ONE! I ate my words but I don't mind, beca...